2S Visits
Manager guide — visits, templates & checklists
1. Who this is for
| Role | Phone app | Dashboard |
|---|---|---|
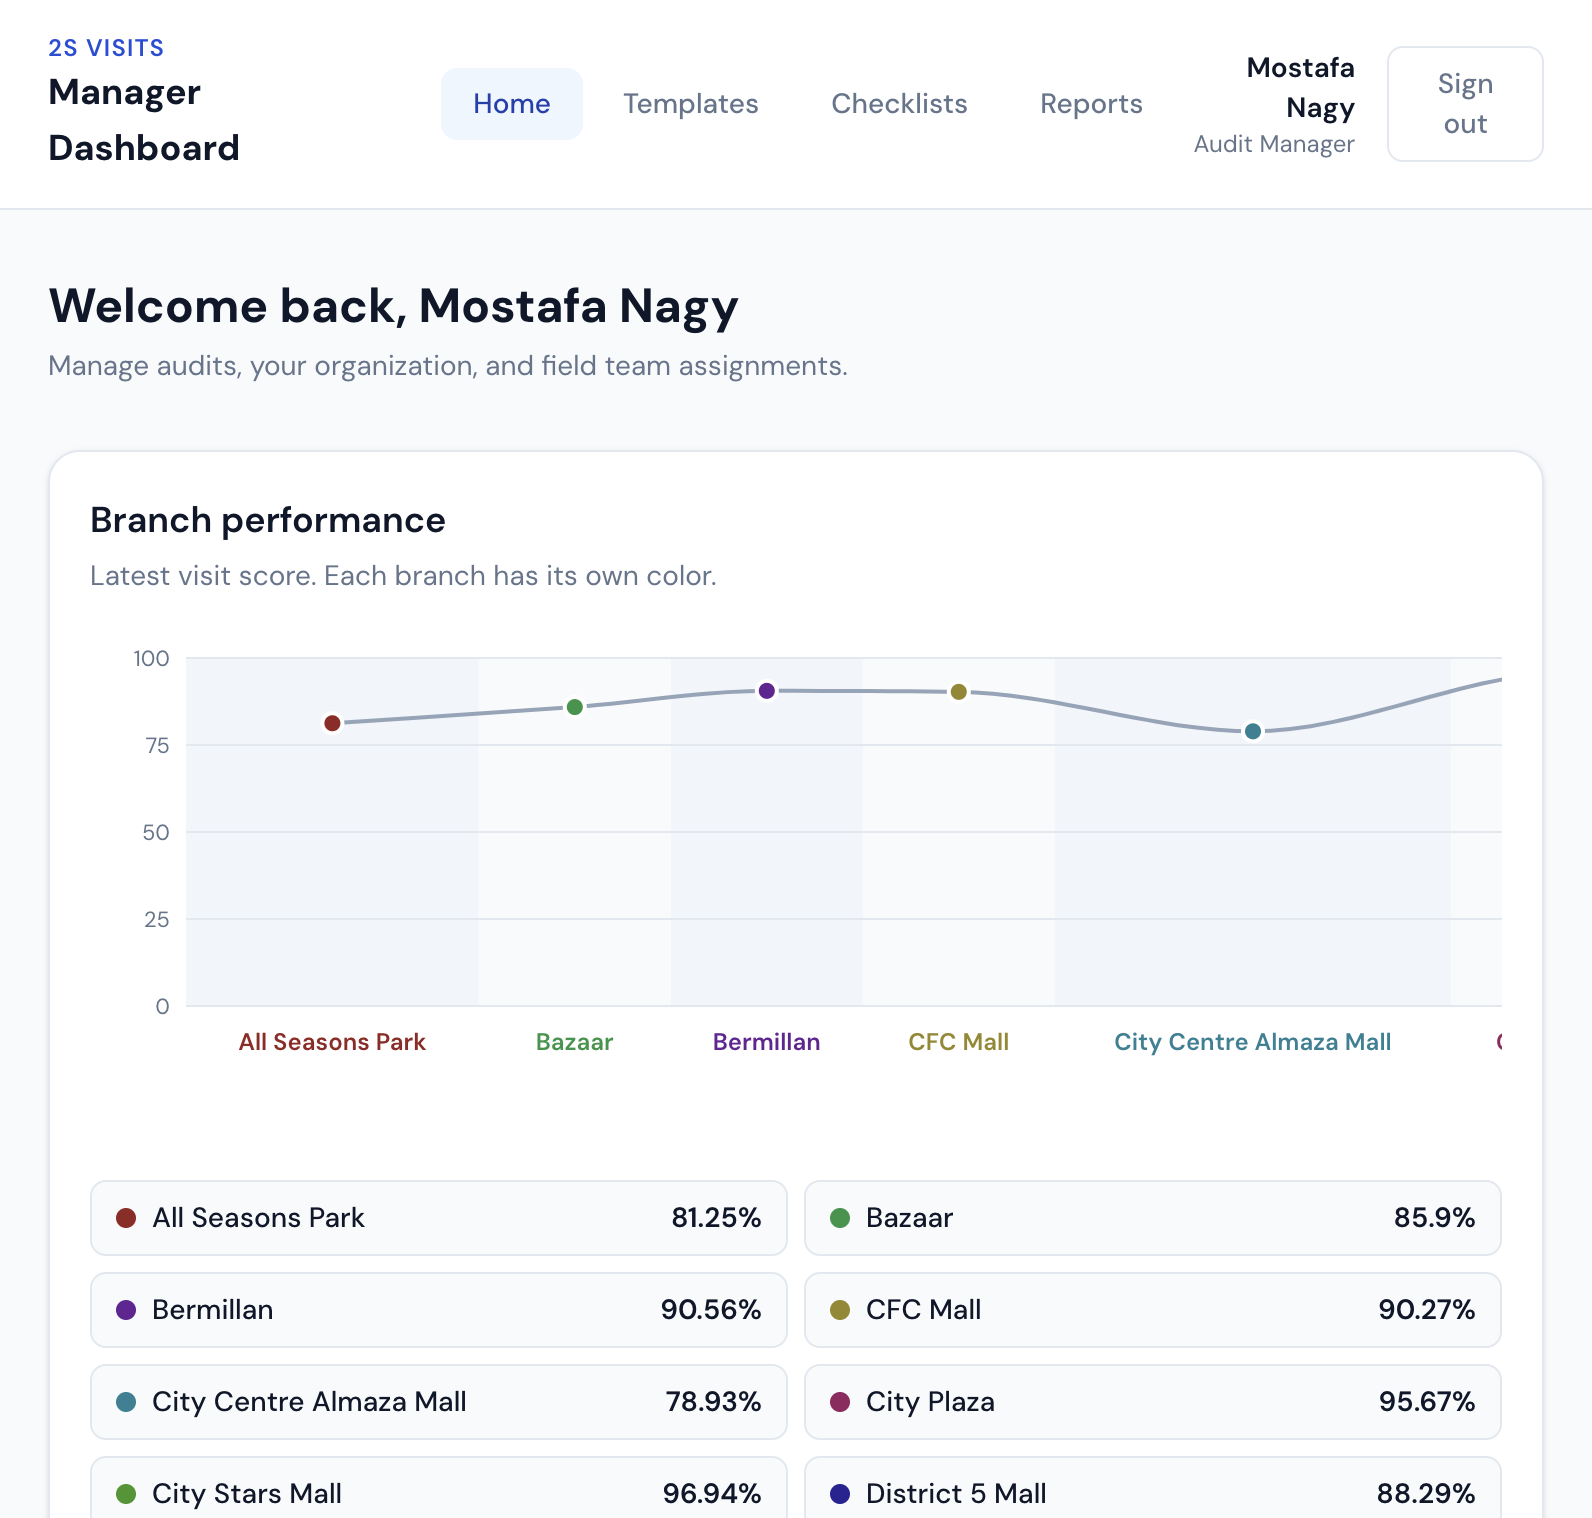
| Area Manager | Visit your branches, answer the checklist, submit | See scores for your area; open reports |
| Regional Manager | Same — visit stores when needed | Wider view of branches; review reports |
| Audit Manager | Do visits yourself when needed | Build templates, assign checklists, review all reports |
2. Do a full store visit (phone)
Use this when you (or someone on your team) go to a branch and complete the audit checklist.
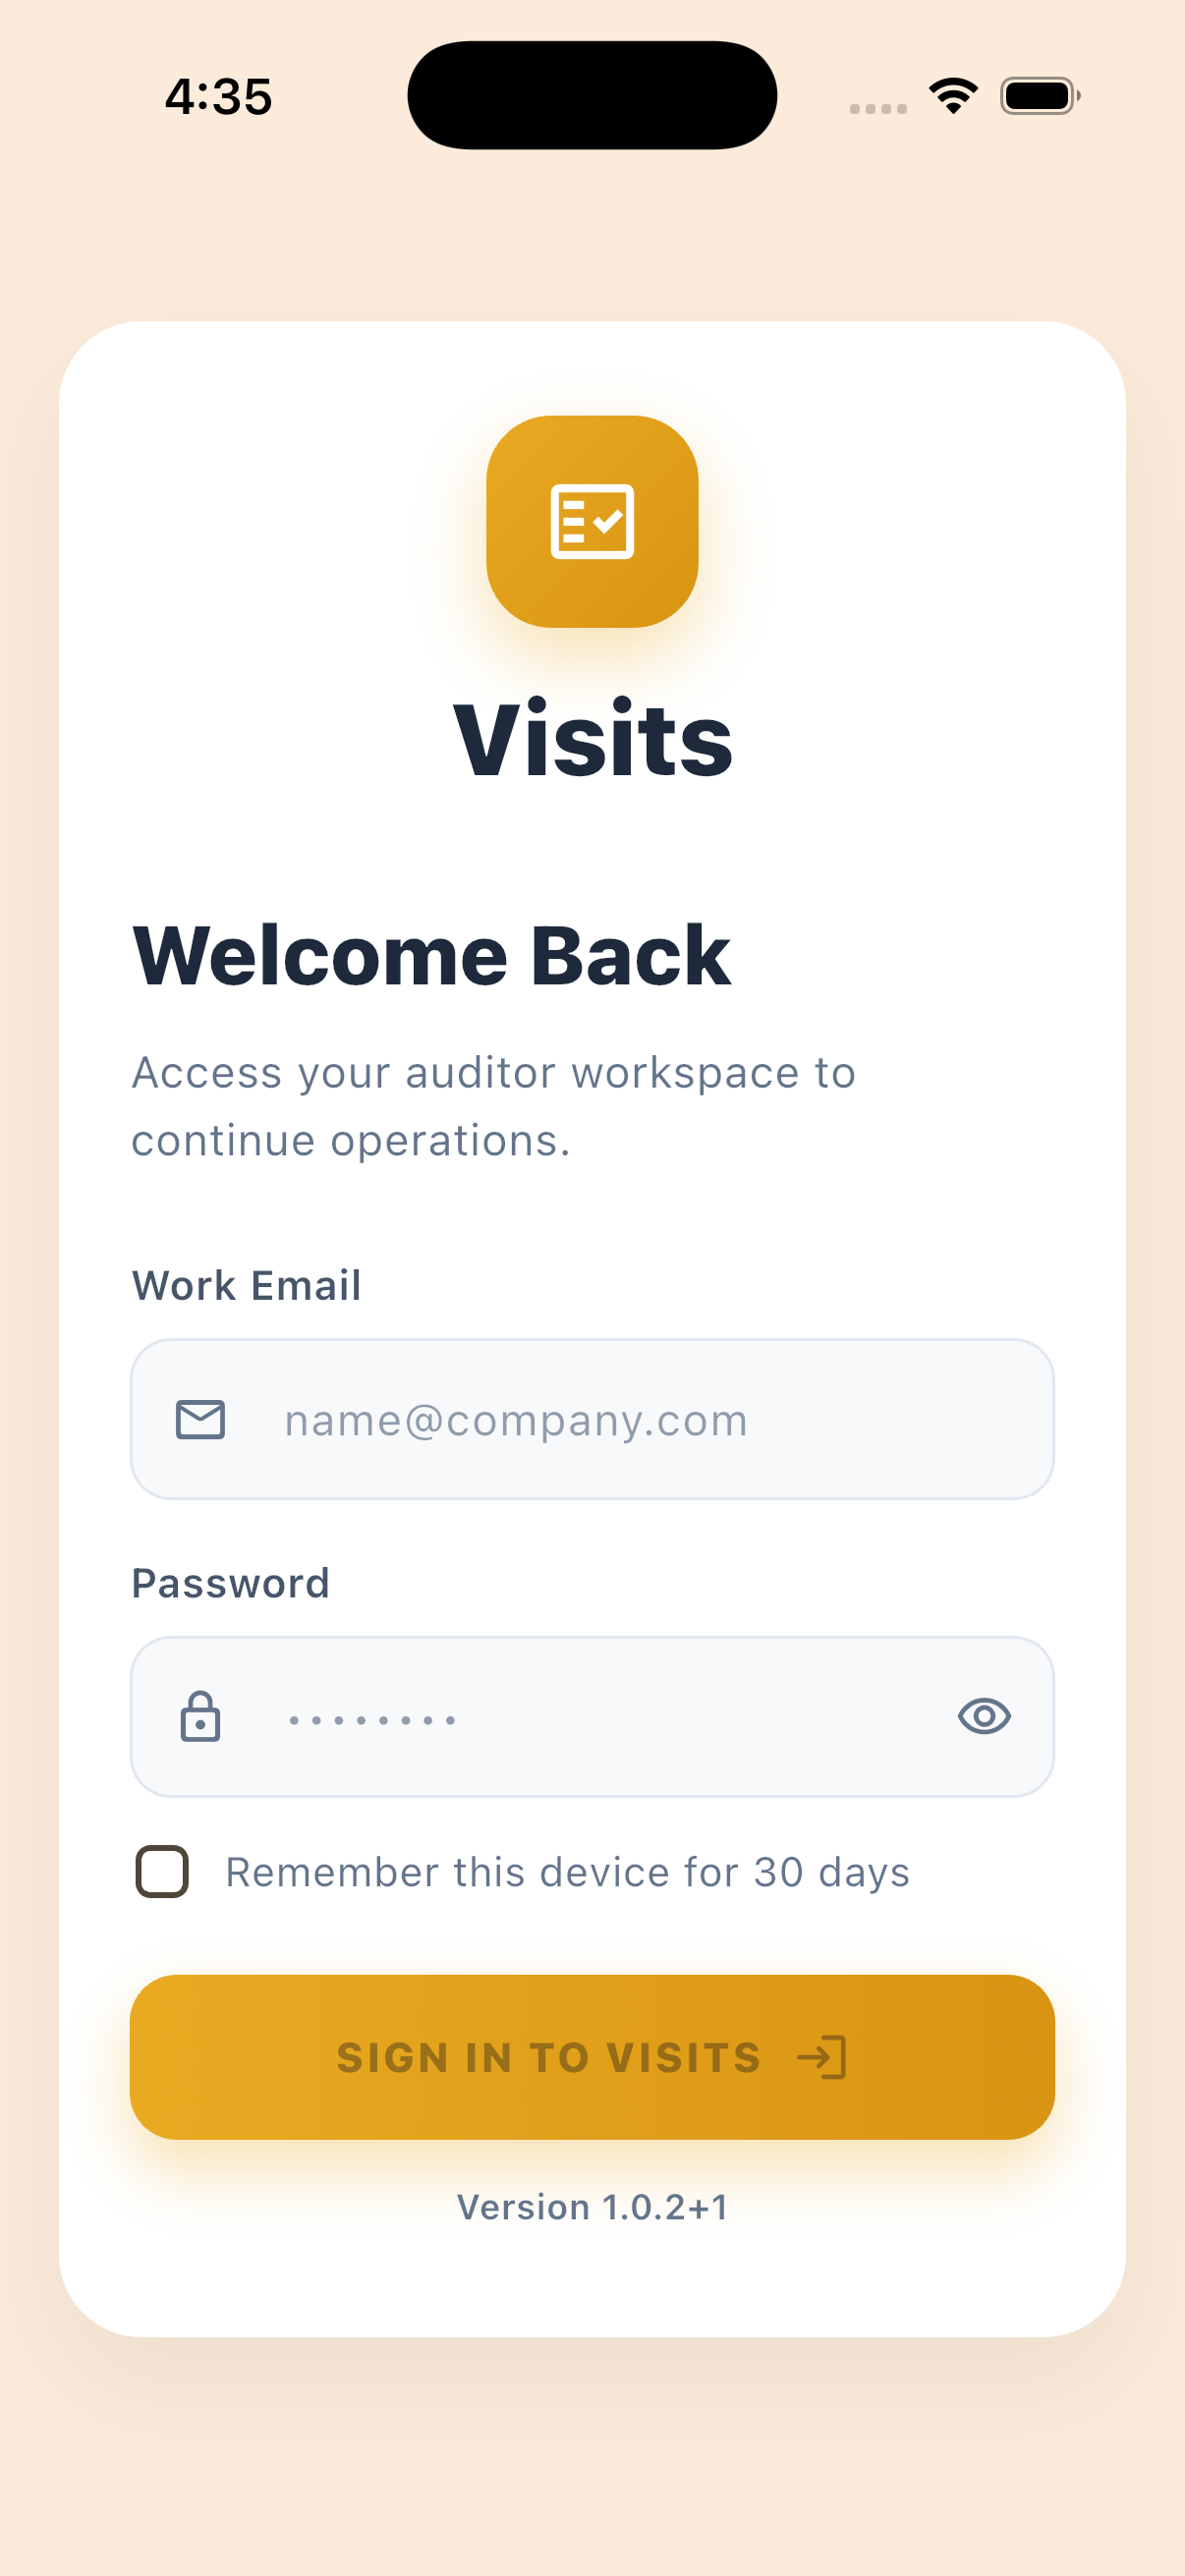
2.1 Sign in
- Open the 2s Visits app.
- Enter your work email and password.
- Optional: tick Remember this device for 30 days.
- Tap SIGN IN TO VISITS.
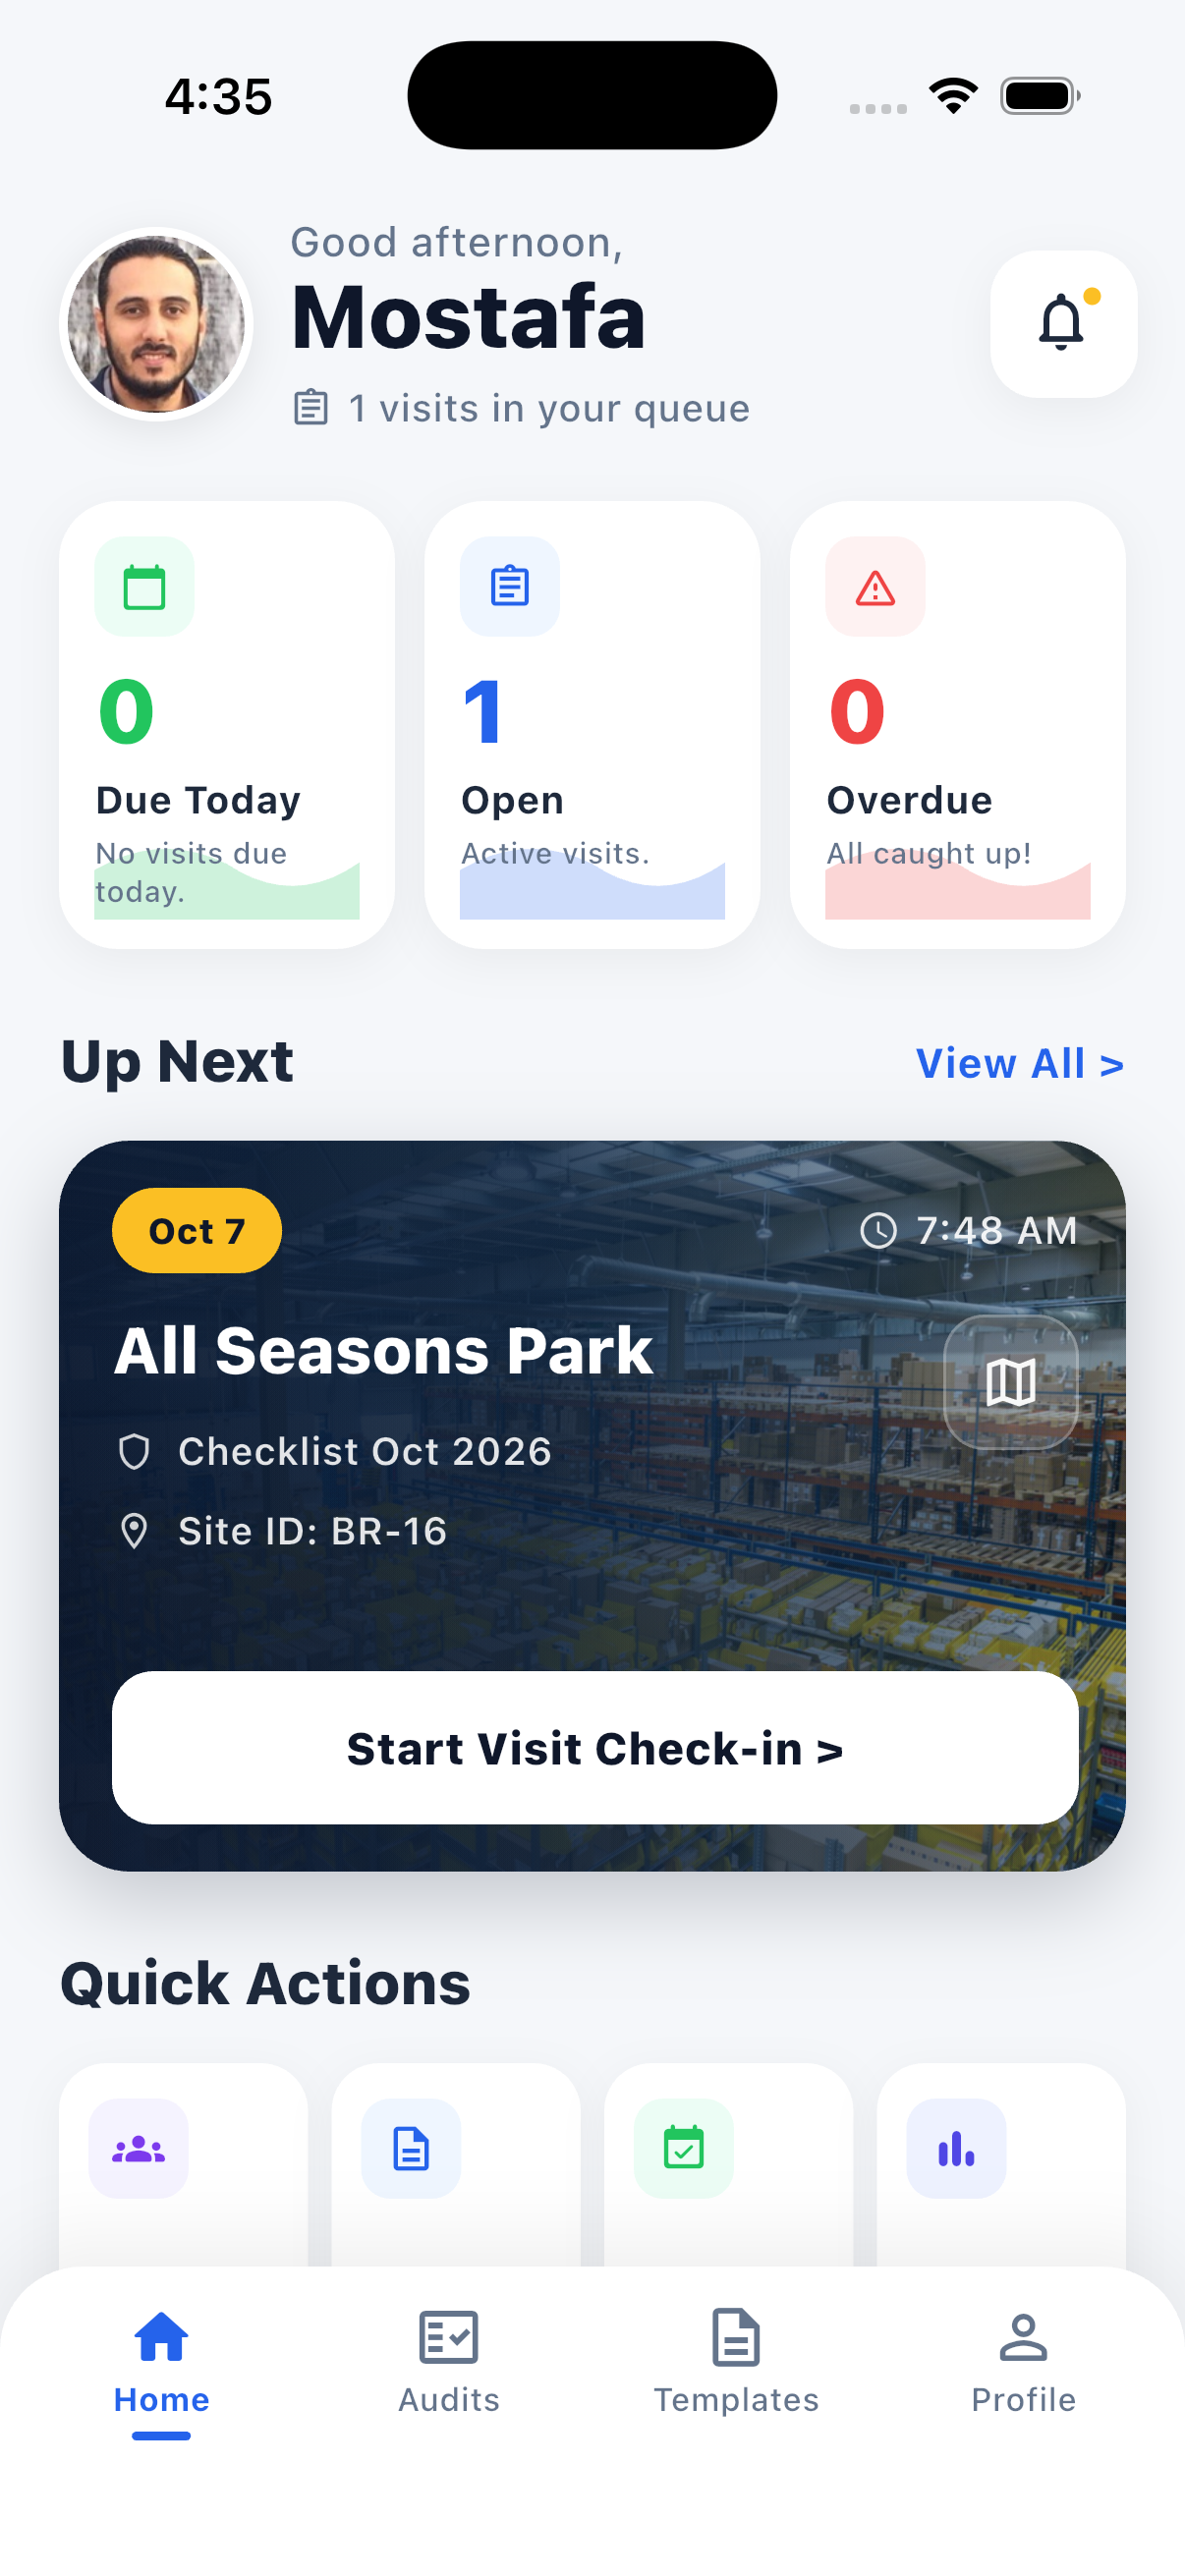
2.2 Home
After sign-in you see today’s overview and shortcuts. Bottom tabs:
- Home — overview
- My Visits / Audits — your visit list
- Templates — start a new visit
- Profile — account and sign out
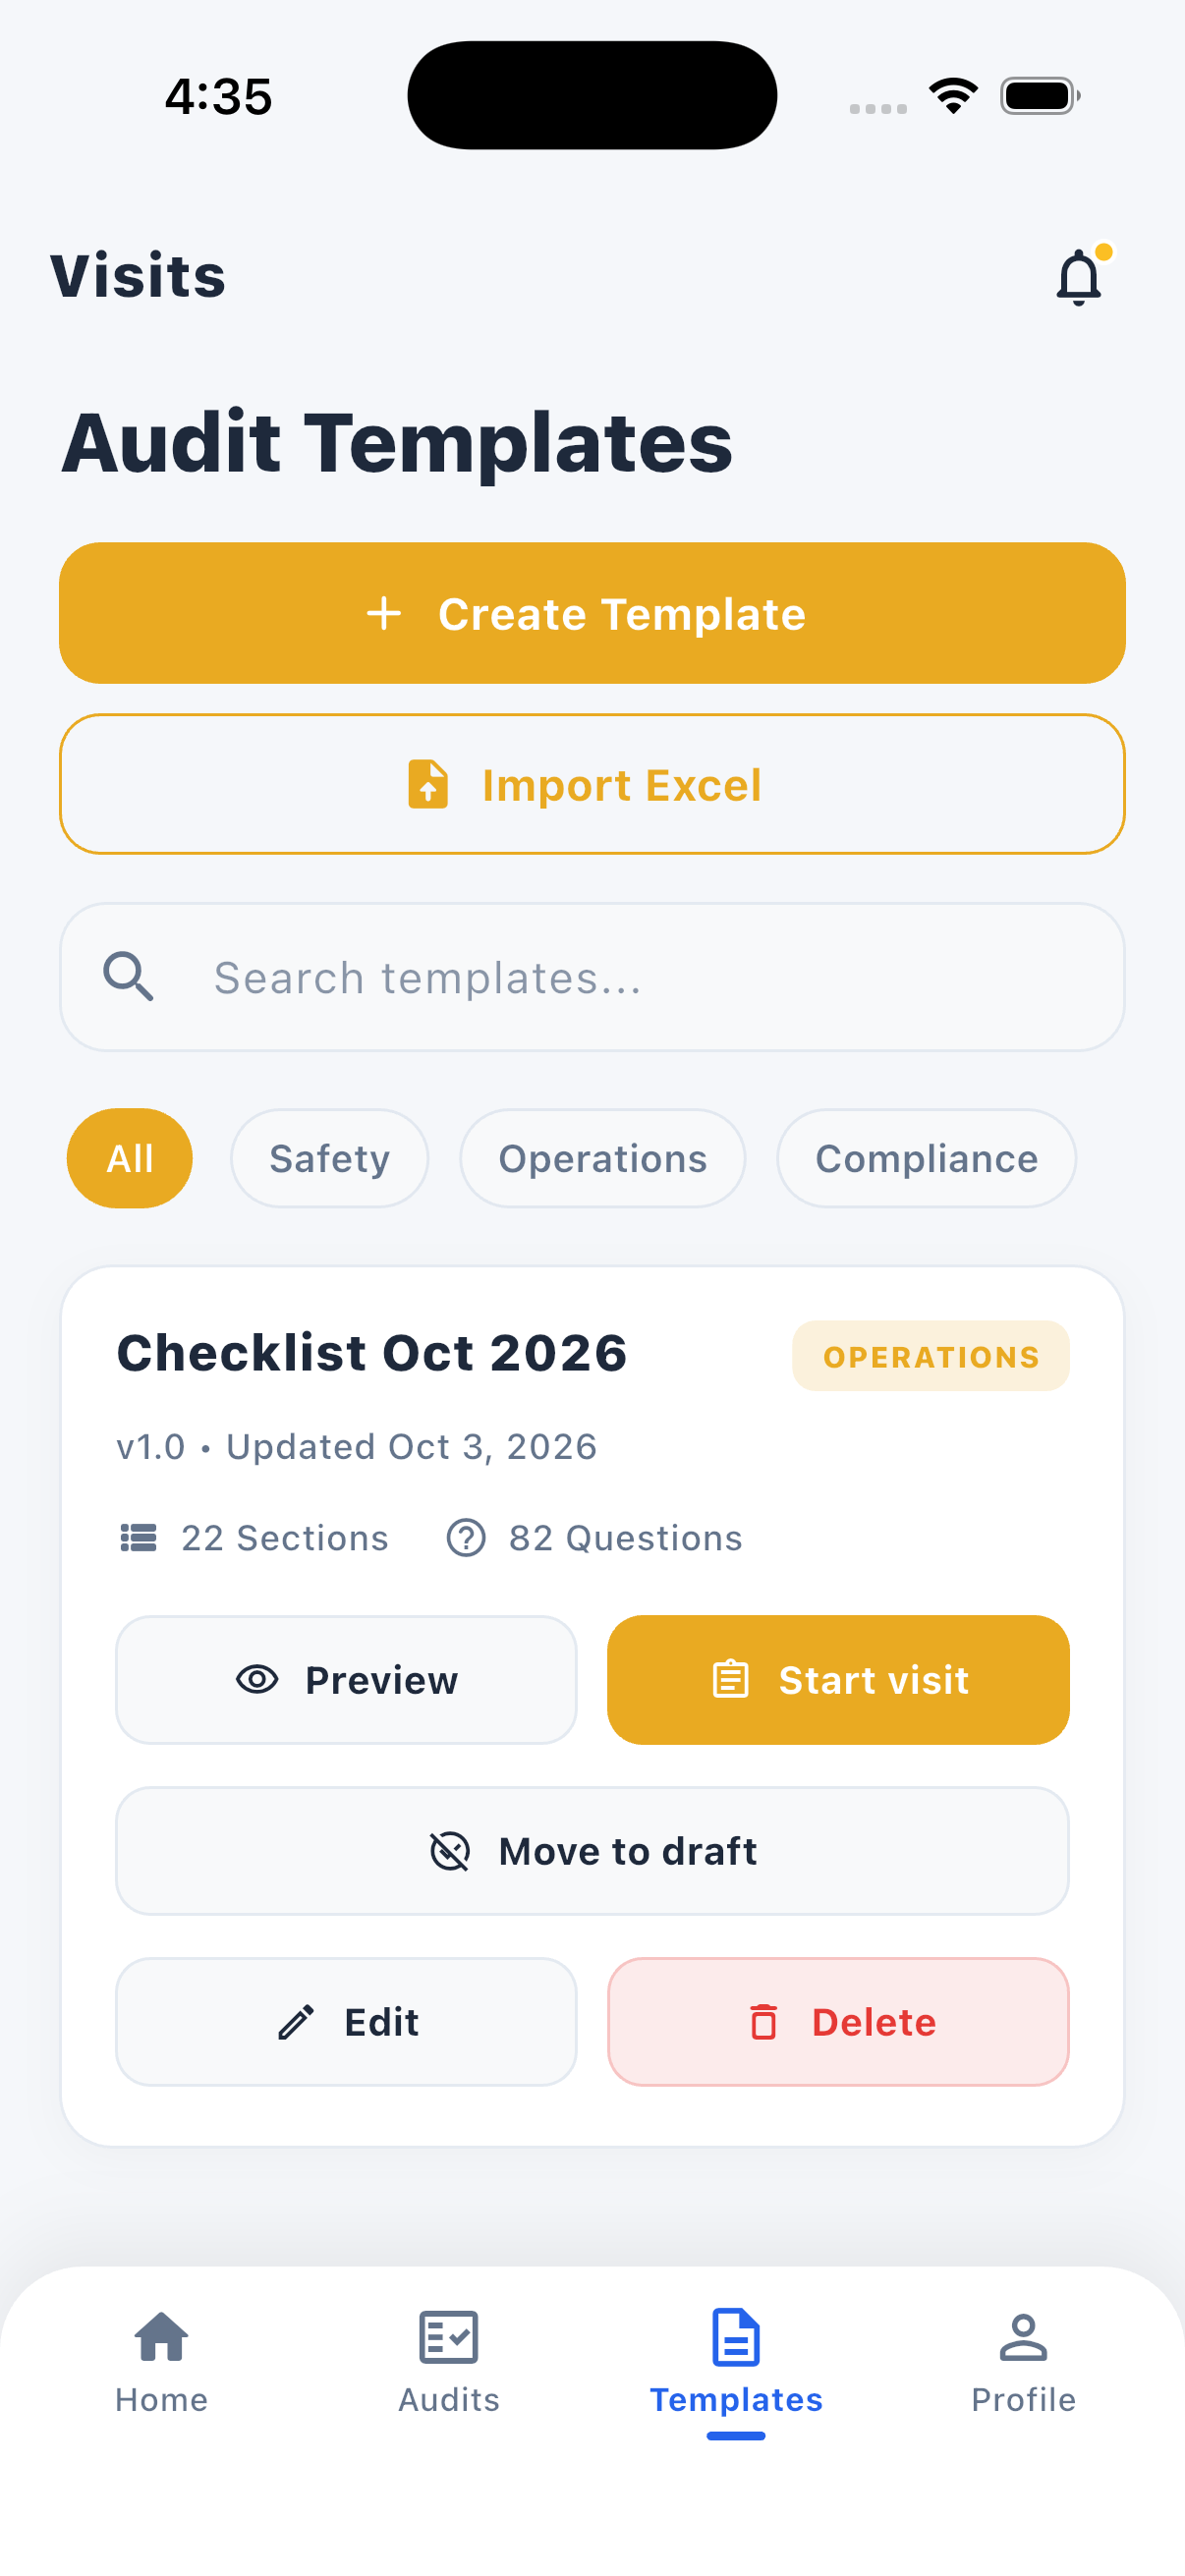
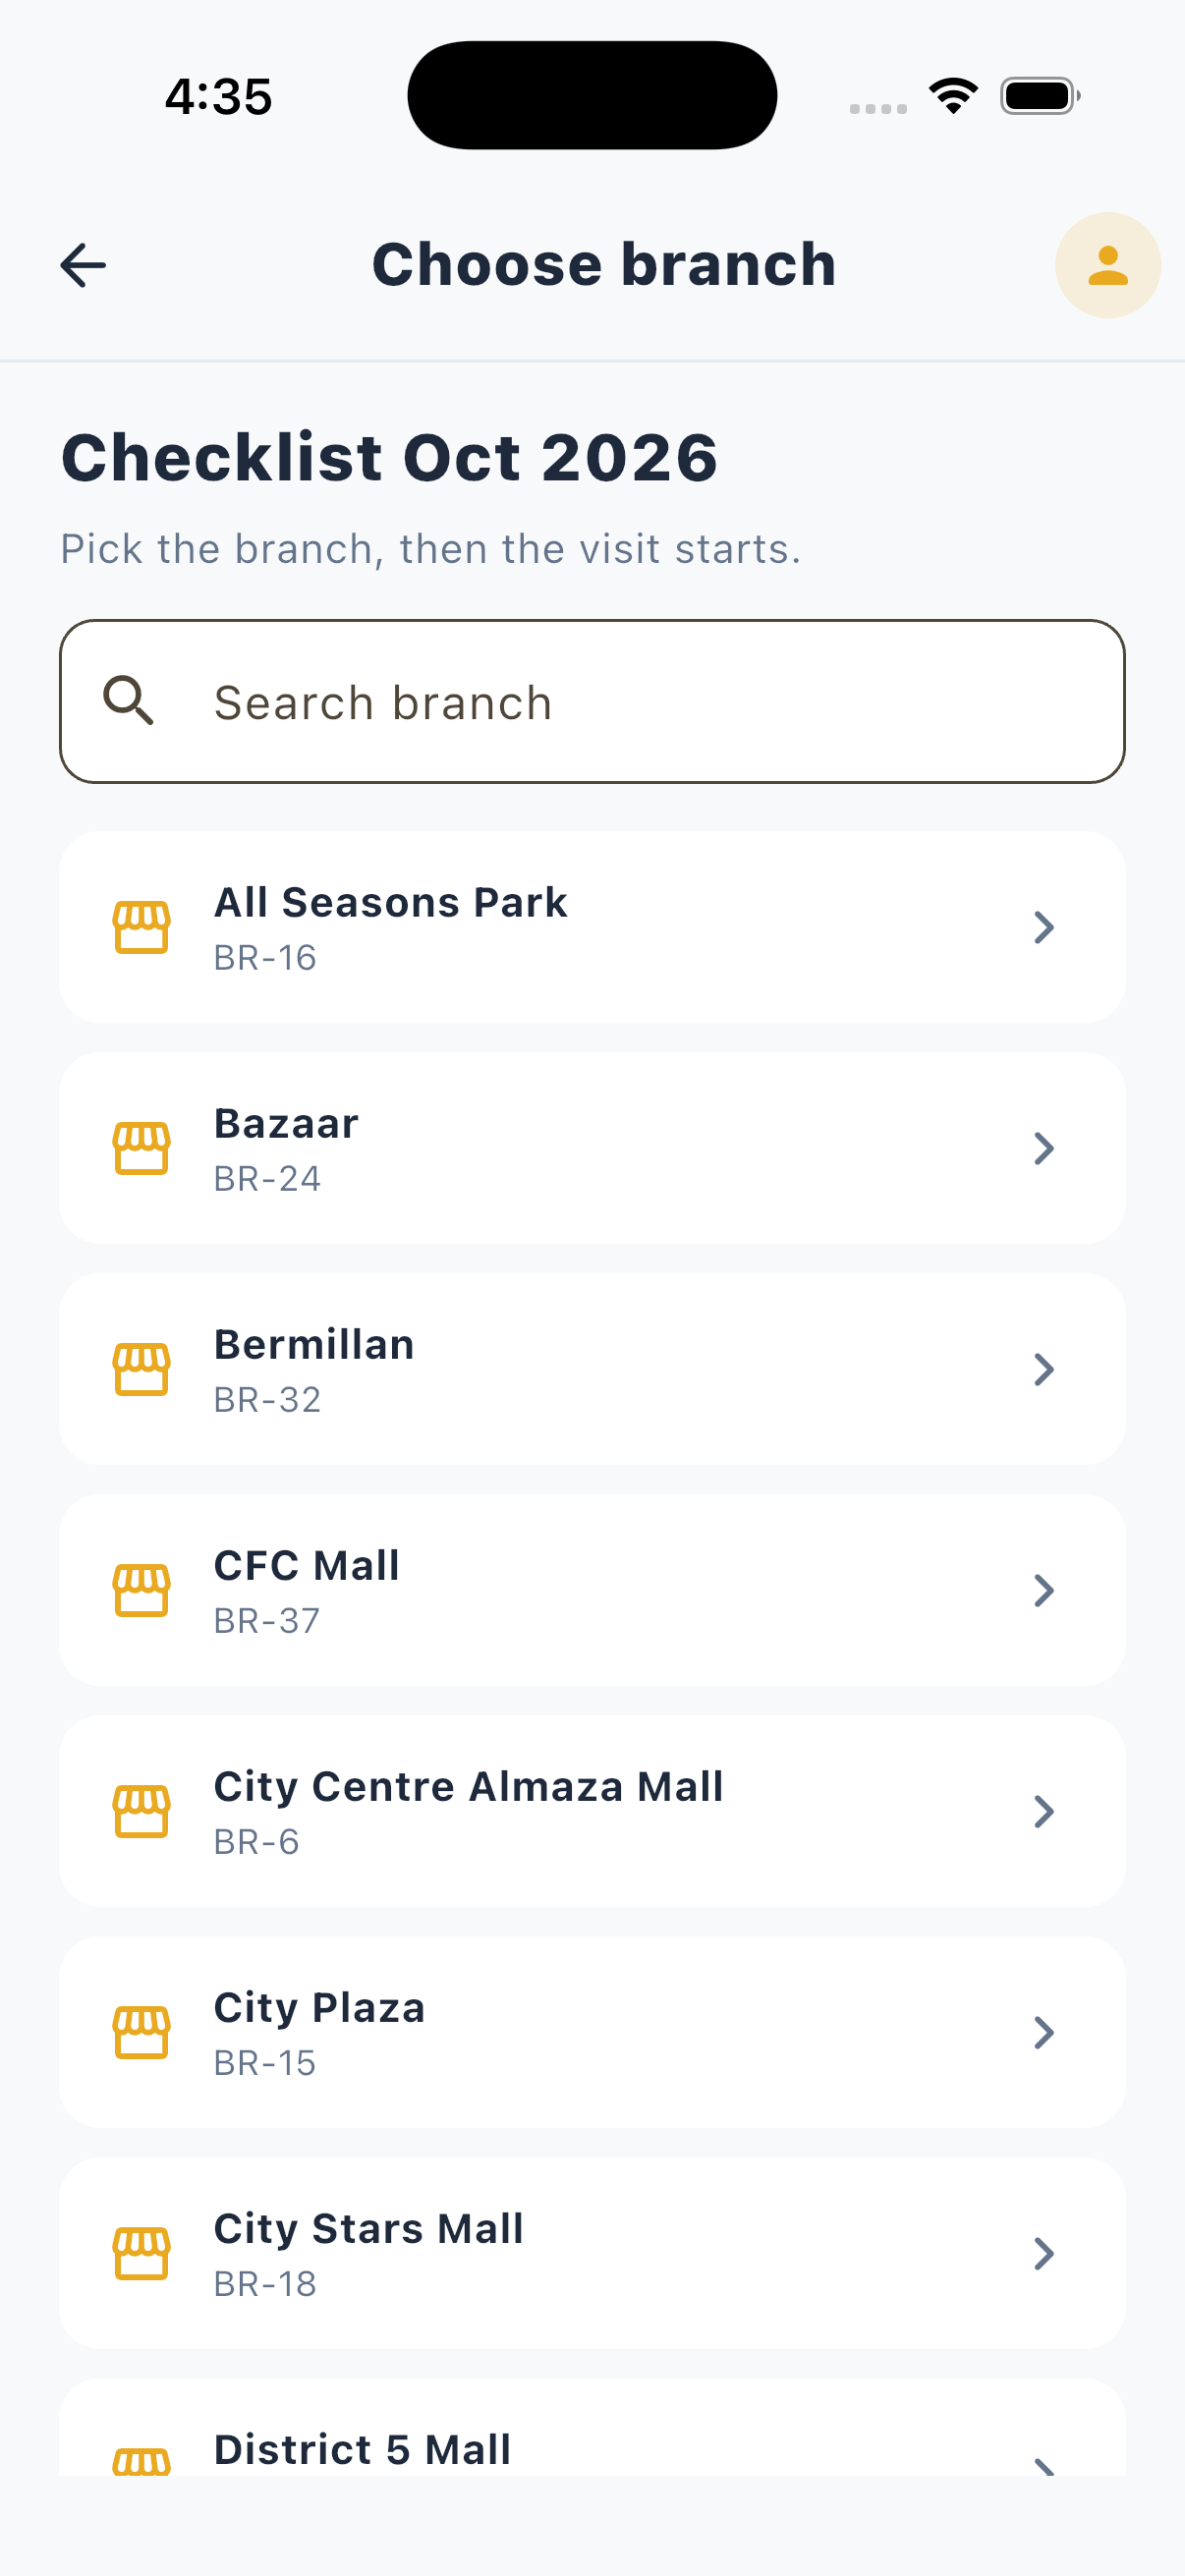
2.3 Start the visit
- Open the Templates tab.
- Choose the published checklist you need.
- Pick the branch you are visiting.
2.4 Check in at the store
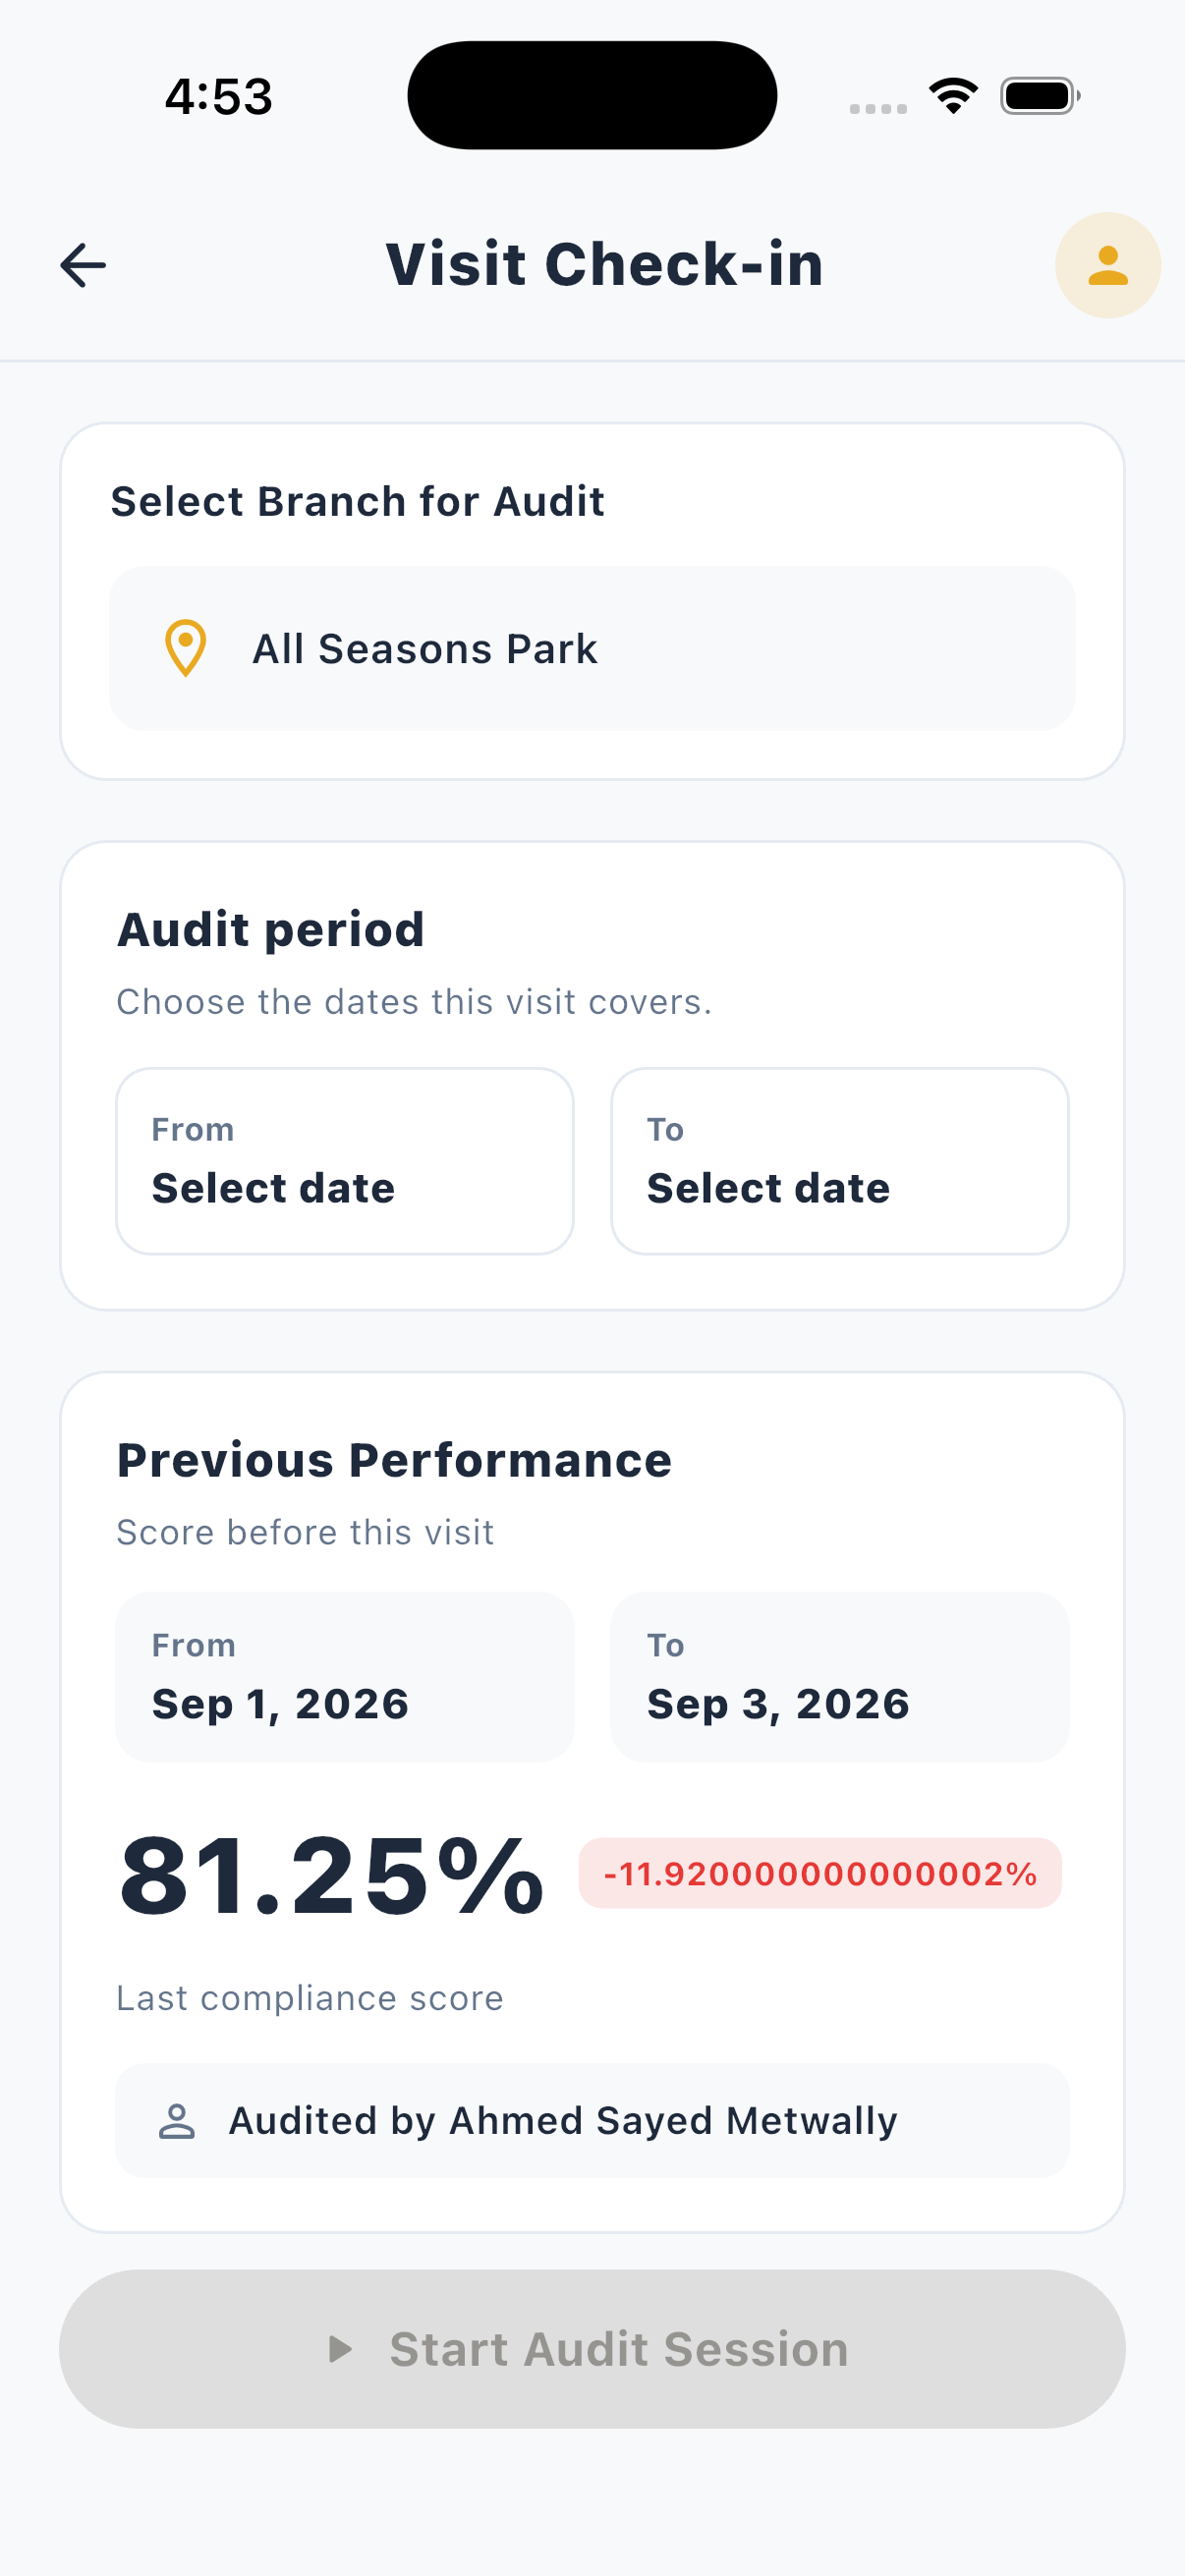
Before questions start, confirm the visit details:
- Set the audit period (from / to dates).
- Confirm your location if the app asks (some roles skip this).
- You may see the previous visit score for that branch.
Then tap Start Audit Session.
2.5 Answer the questions
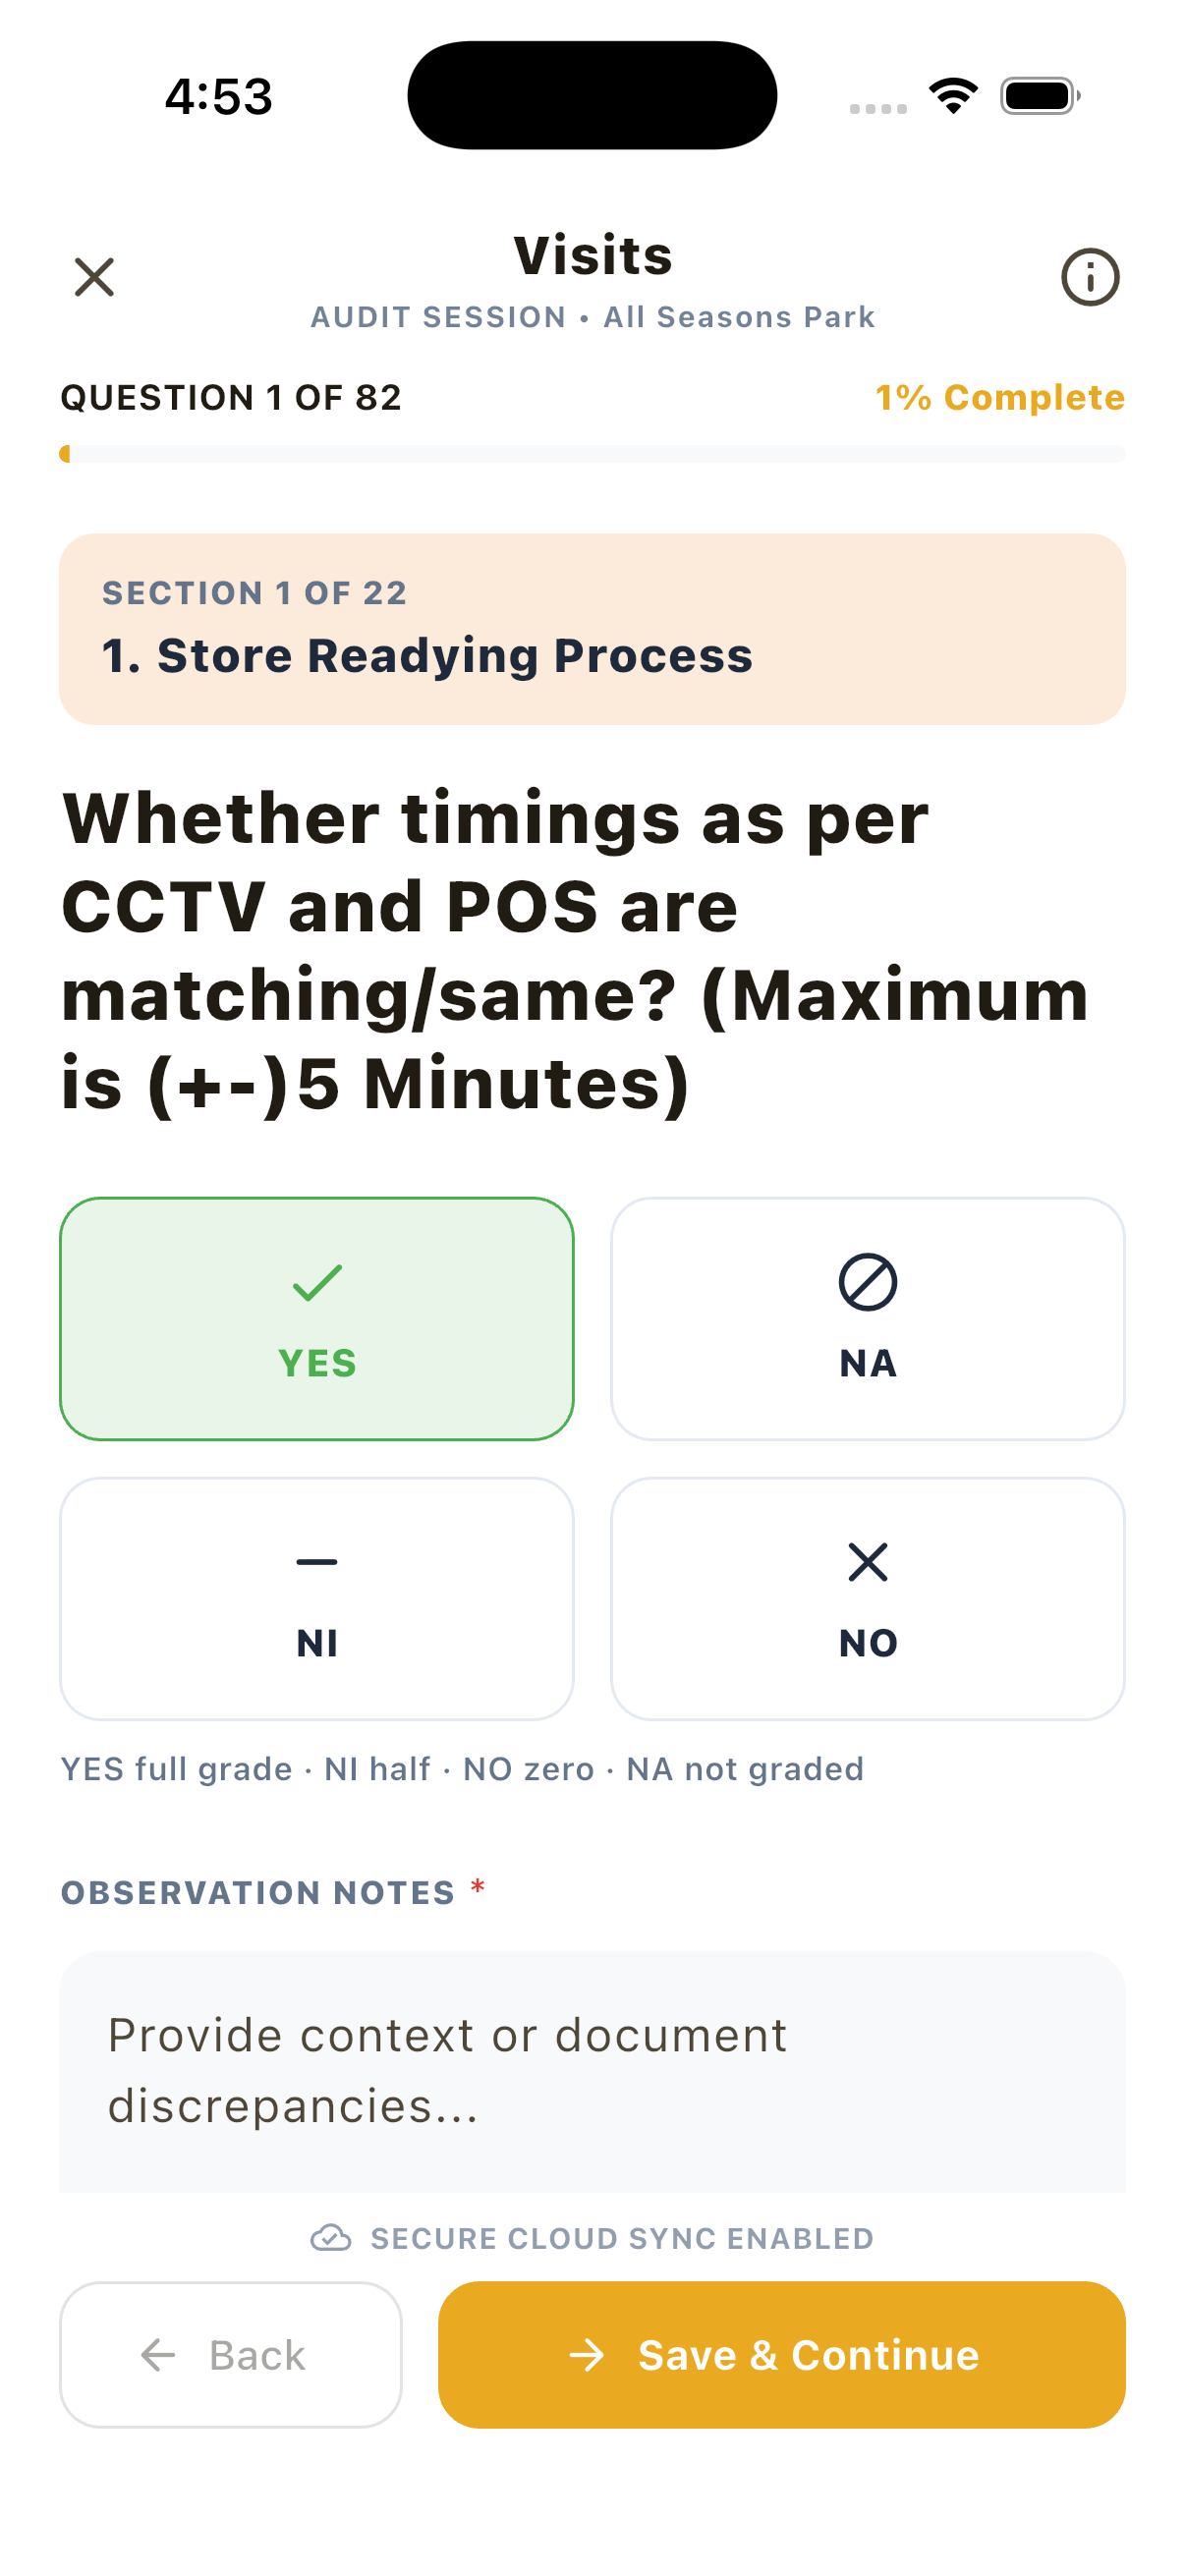
- Work through each section and question.
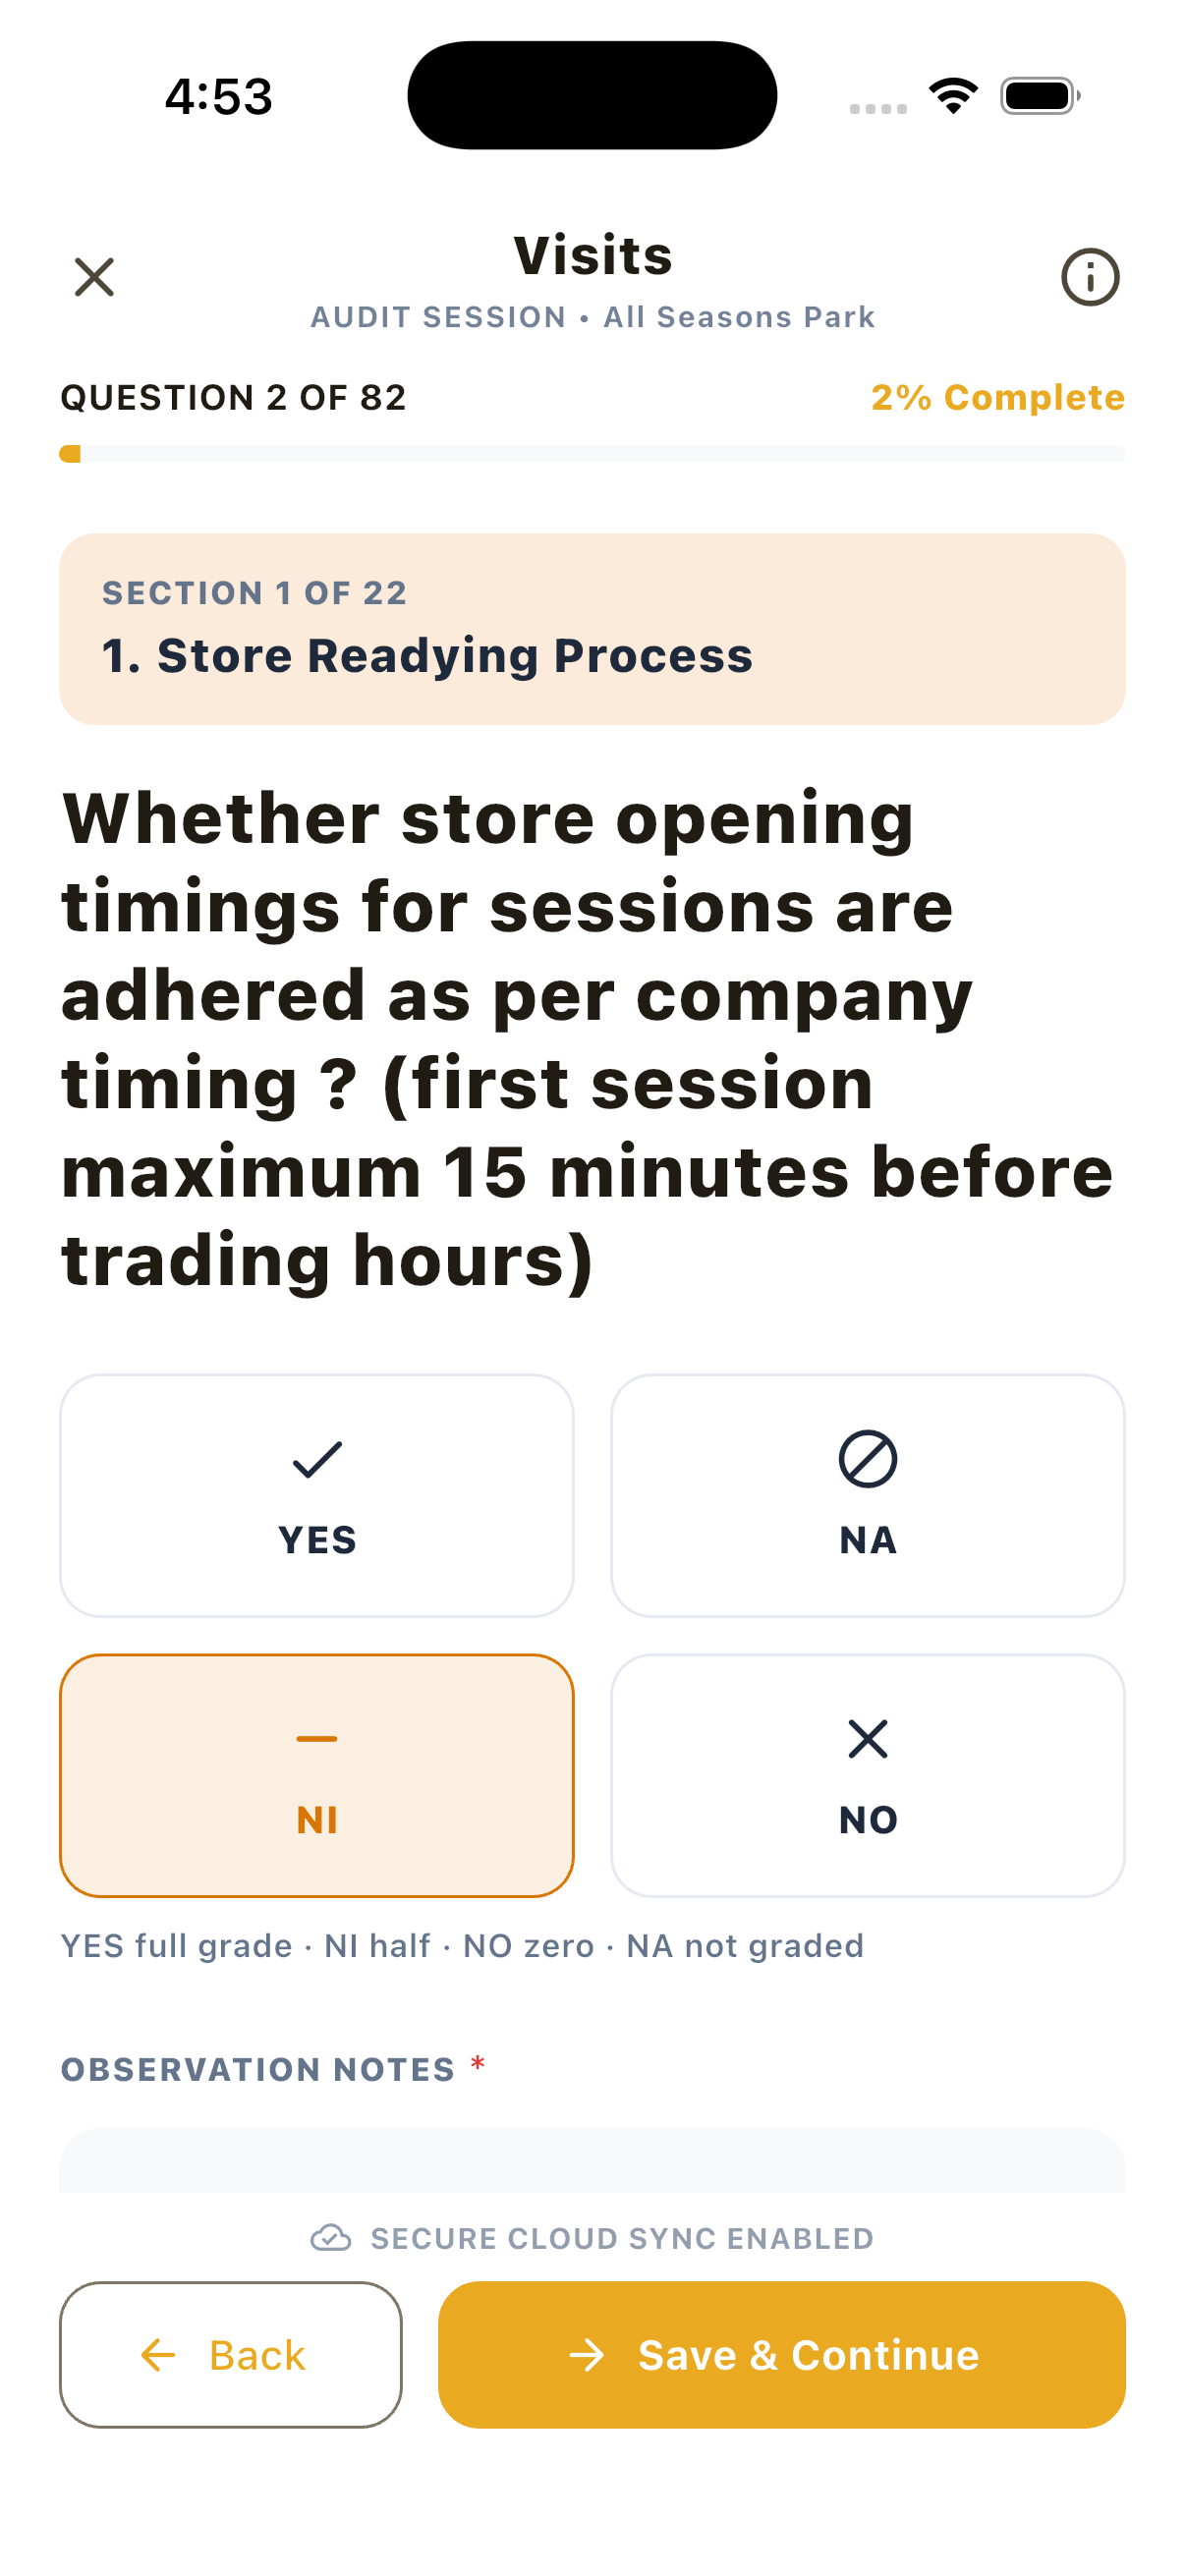
- Choose the answer (Yes / NI / No / NA, rating, or text — depending on the question).
- Add a note when required.
- Attach a photo or video when asked.
- Tap Save & Continue to move to the next question.
2.6 Review and submit
- On the last question, tap Finish Audit.
- Review your answers on the summary screen.
- Submit the visit.
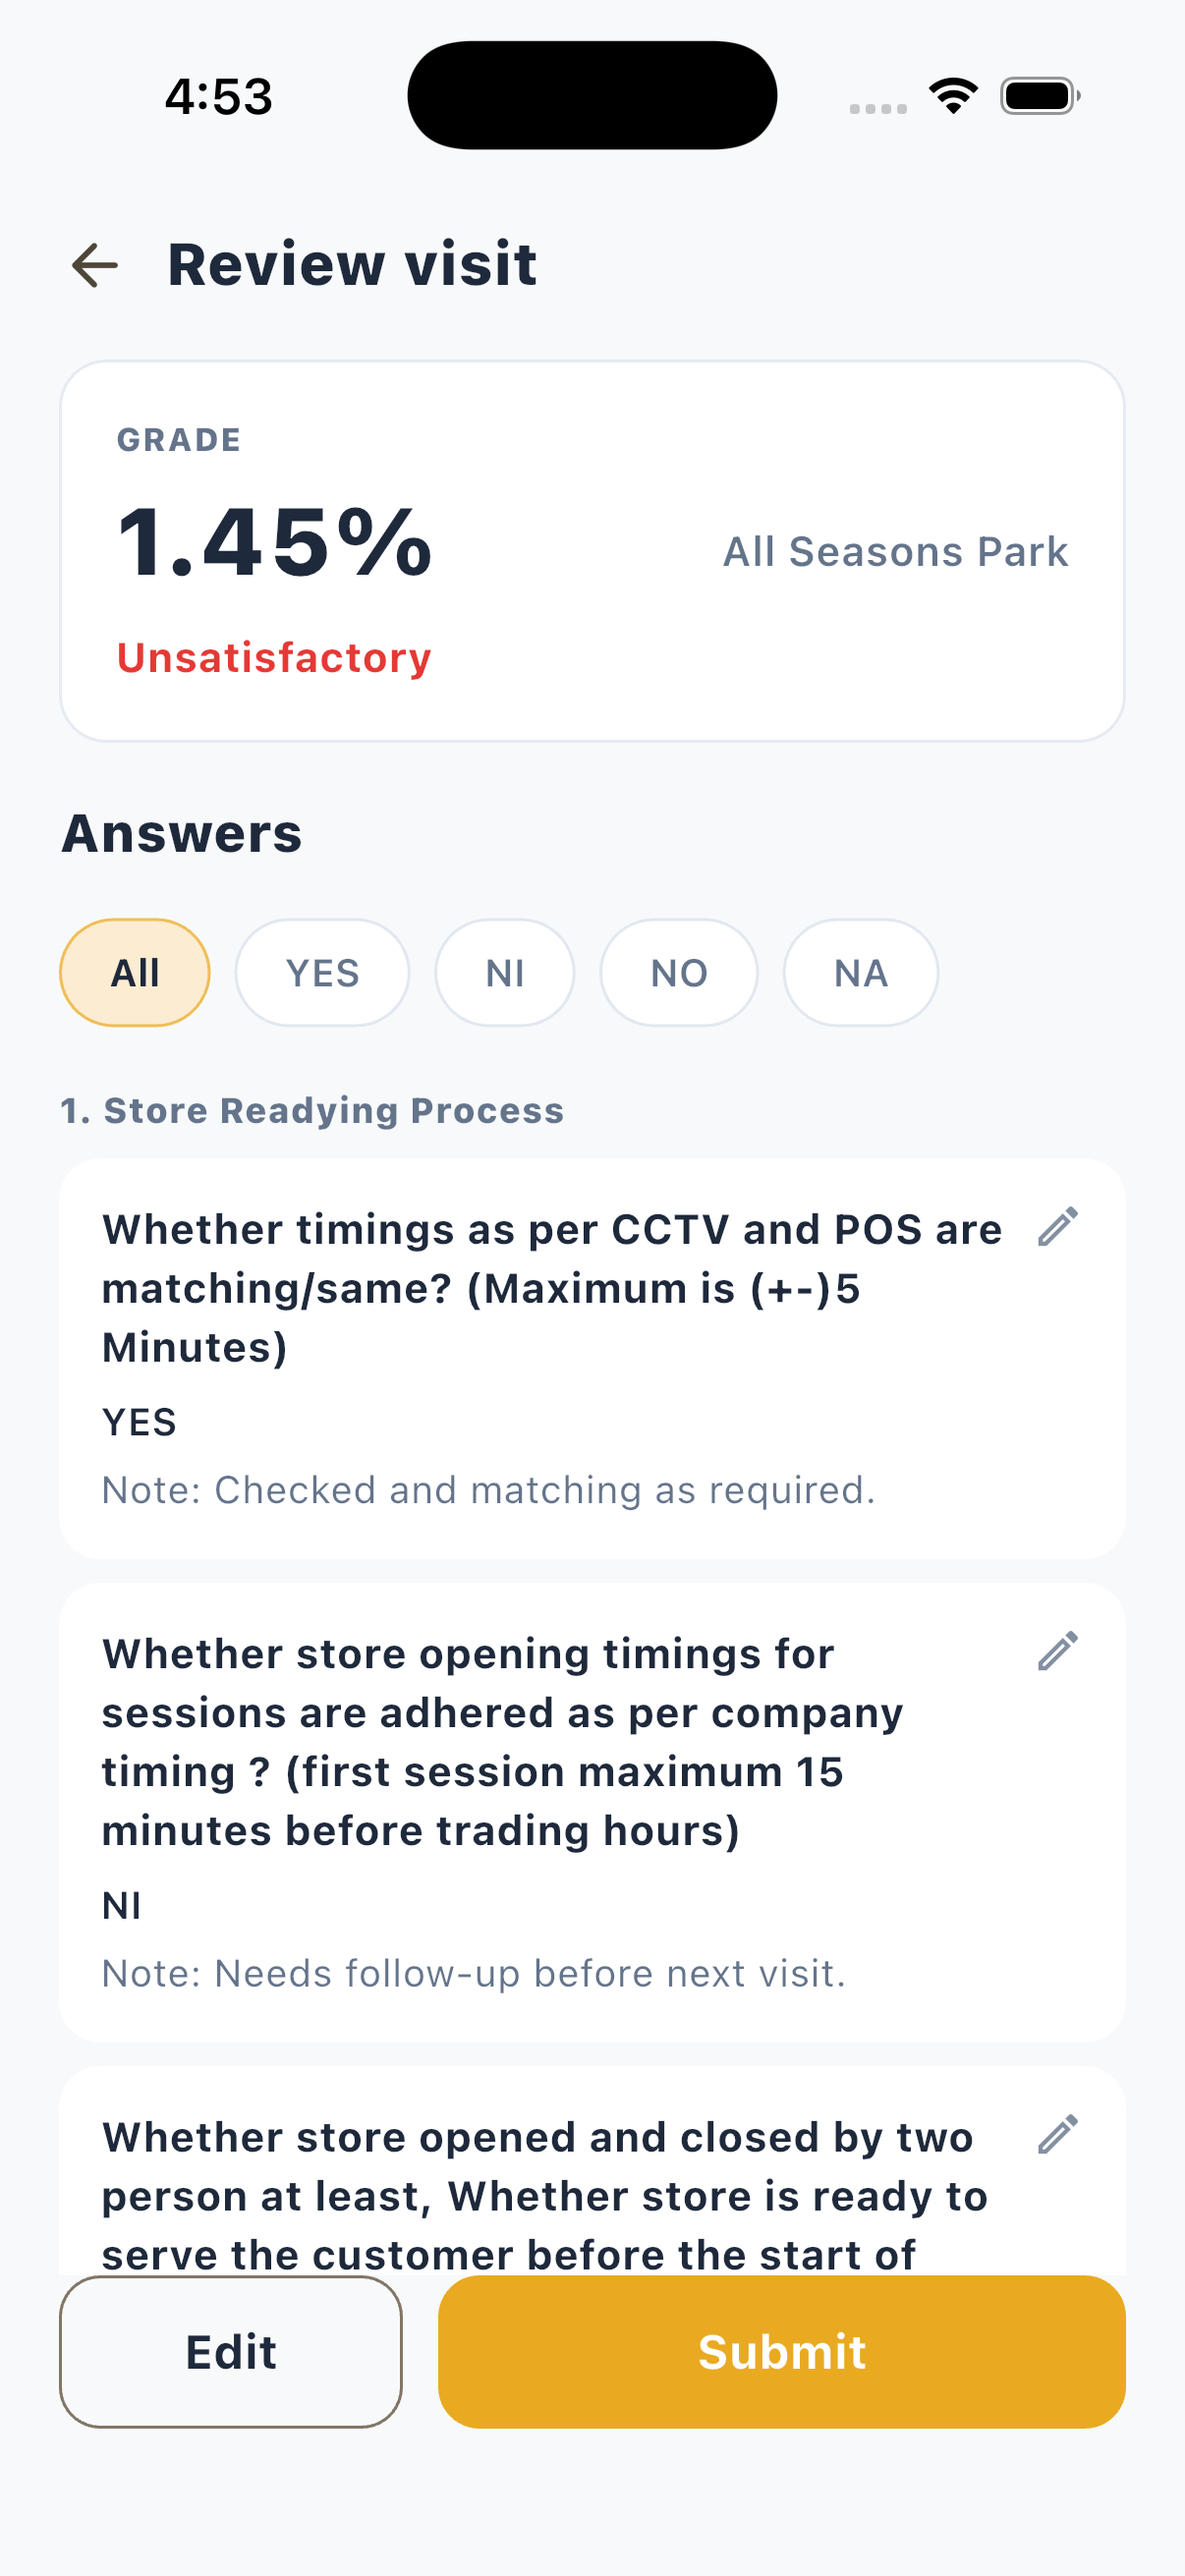
After submit you see the score and risk level (for example Satisfactory or Need Improvement). The visit moves to Completed under My Visits.
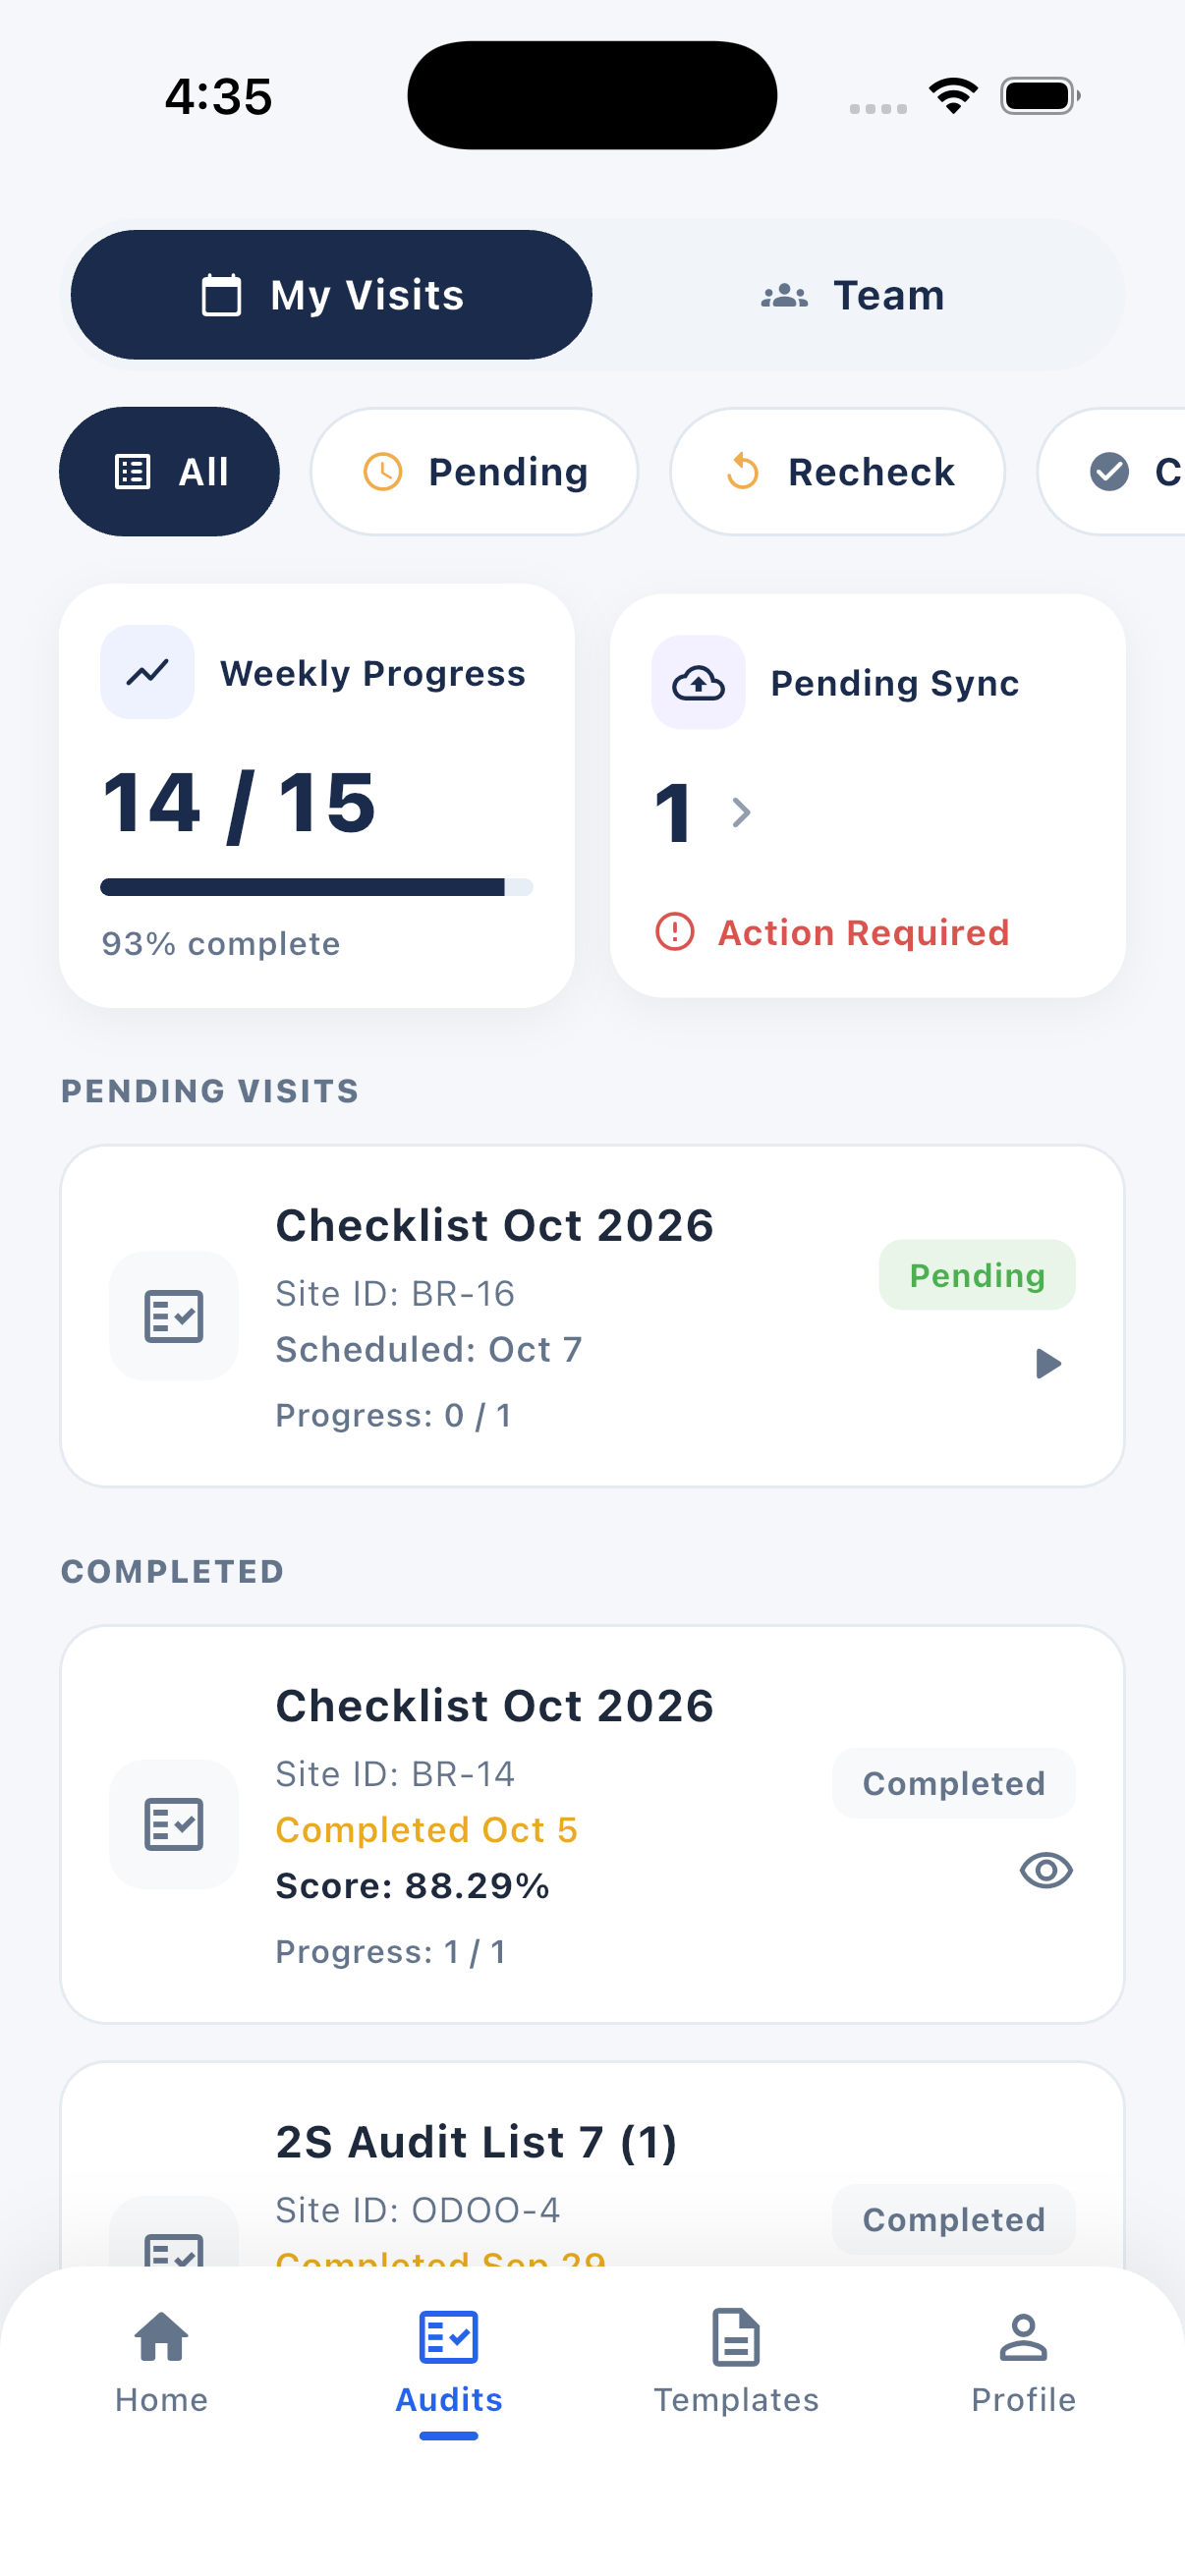
2.7 My Visits list
- Pending — assigned but not finished
- In Progress — started; tap to resume
- Completed — submitted; tap to view the report
2.8 Rechecks
If a manager asks for a re-check on specific questions, those appear under My Visits / Recheck. Open them, answer only the requested items, and submit.
3. Create an audit template (dashboard)
A template is the reusable form: sections, questions, and weights. Audit Managers build this once; then it can be assigned as many checklists / visits as needed.
Open the Visits manager website in your browser and sign in with your work email.
3.1 Open Templates
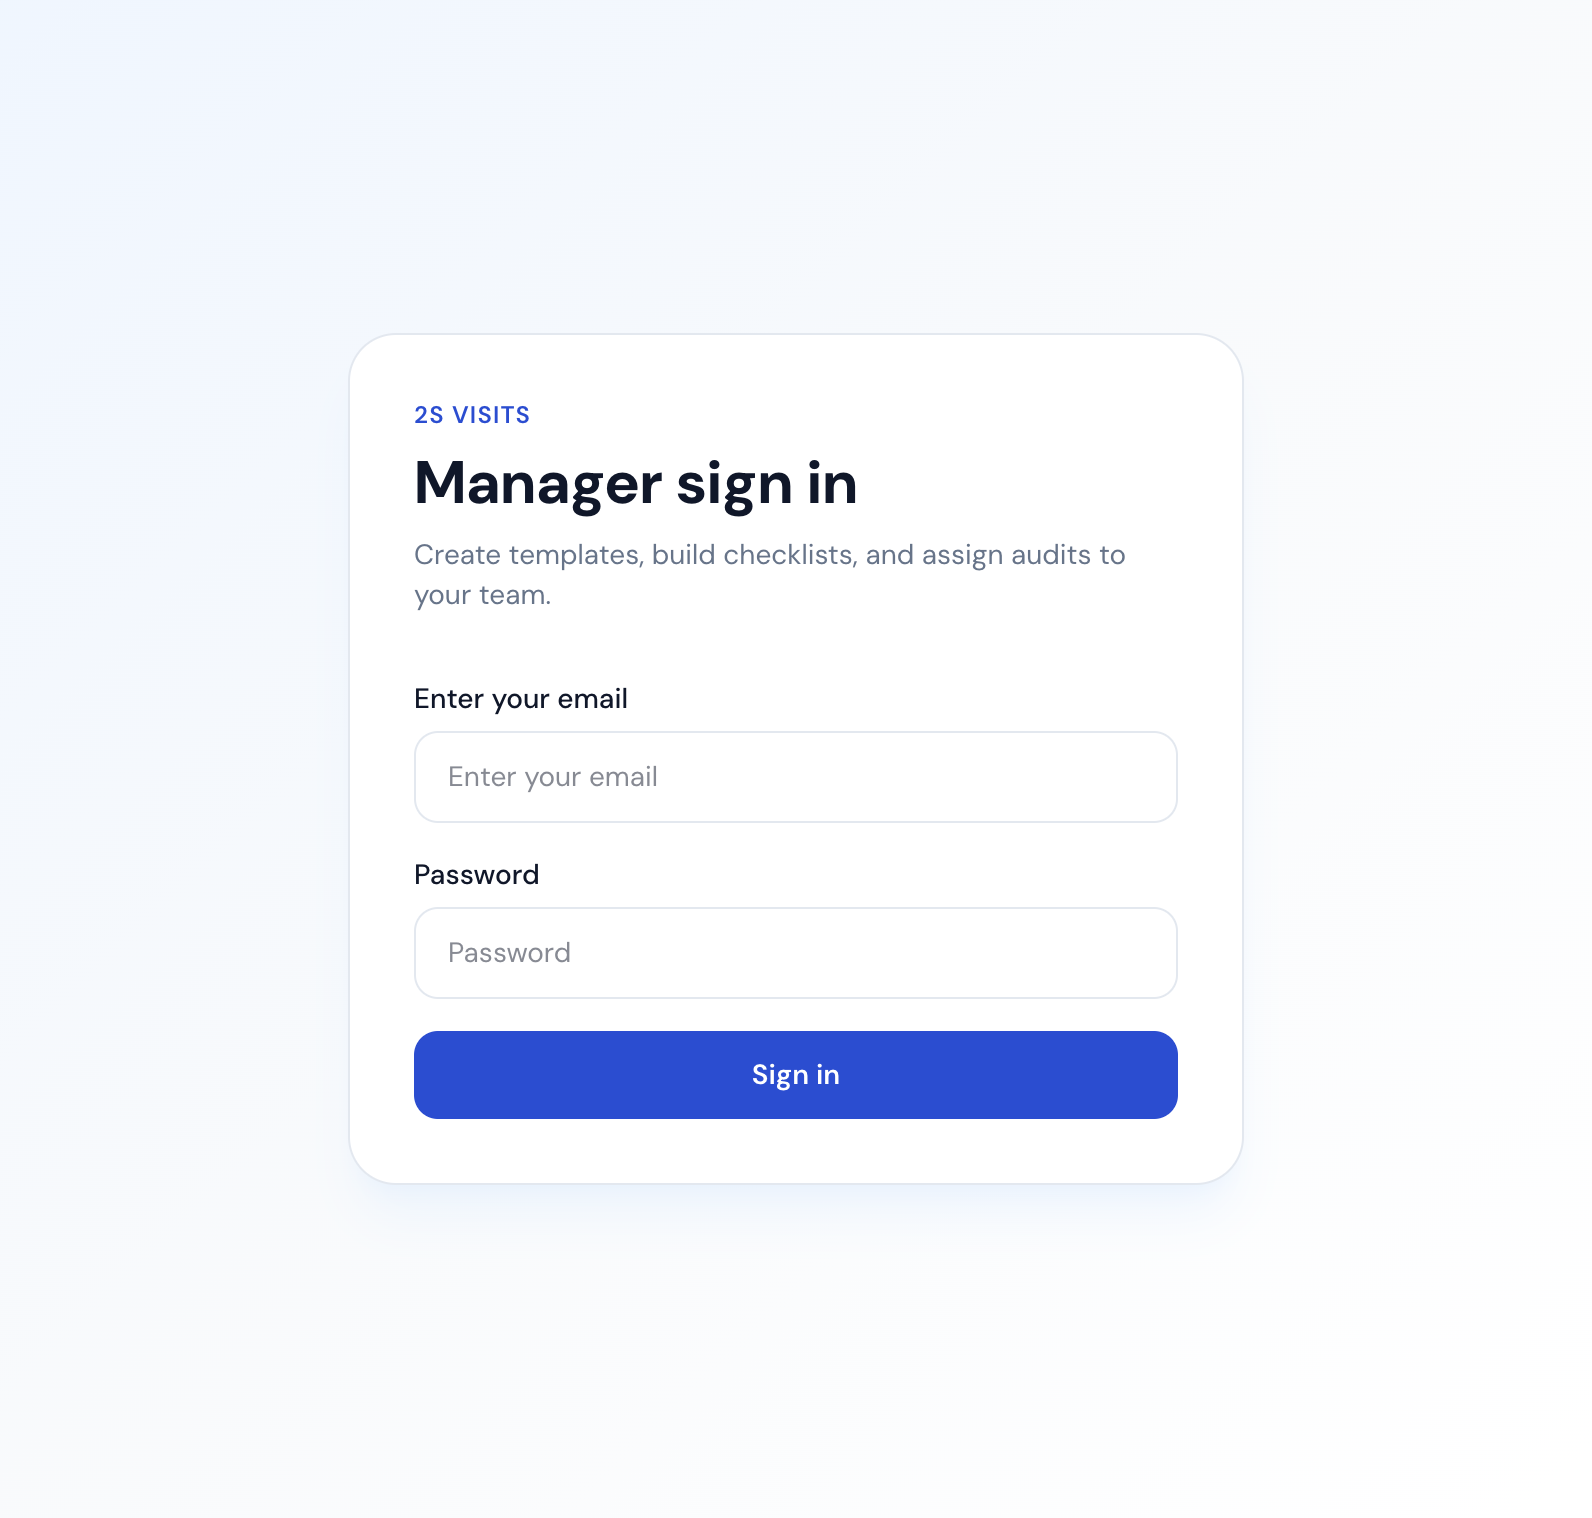
- Click Templates in the top menu.
- Click New template (or Edit on an existing one).
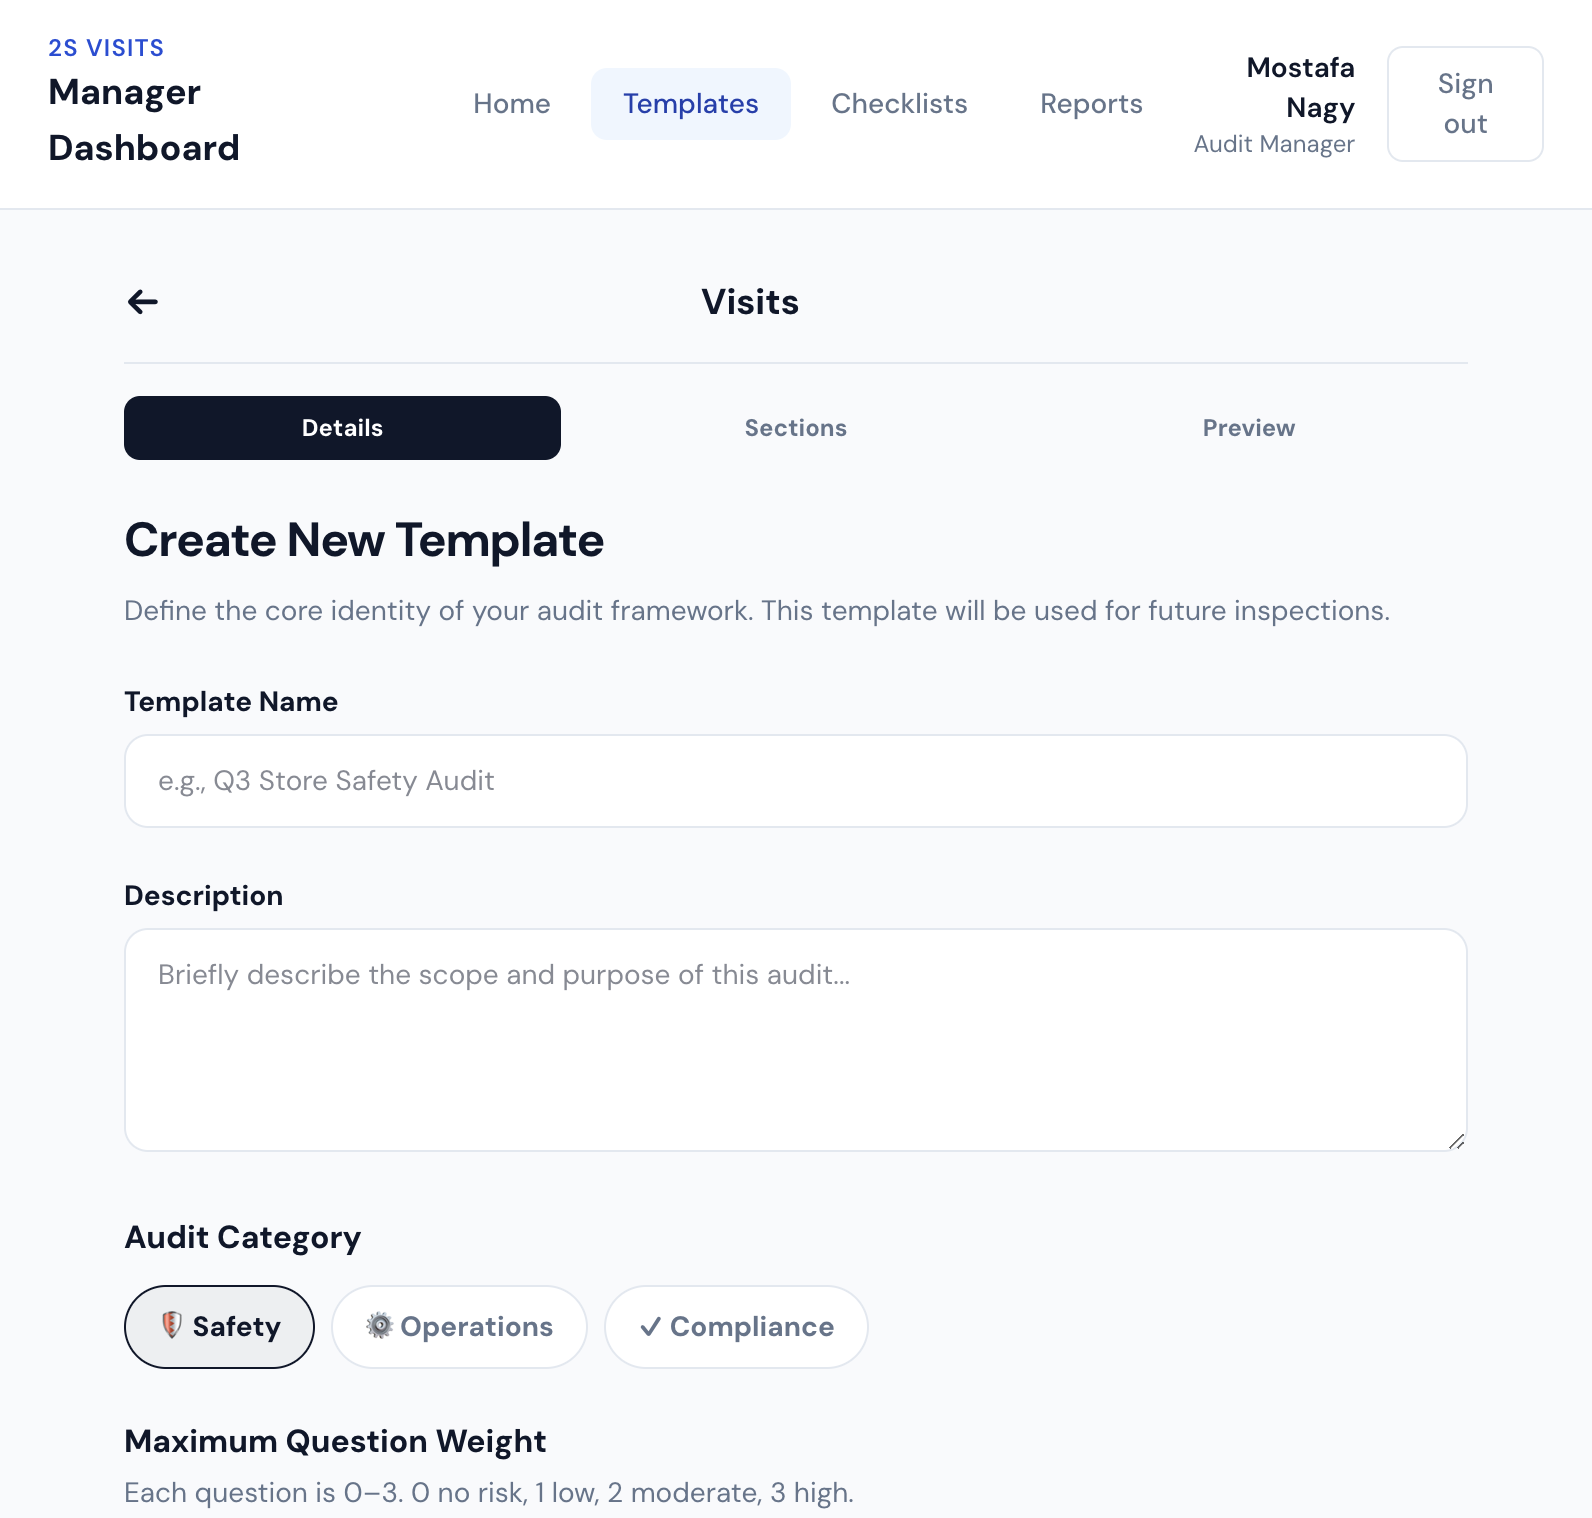
3.2 Step 1 — Details
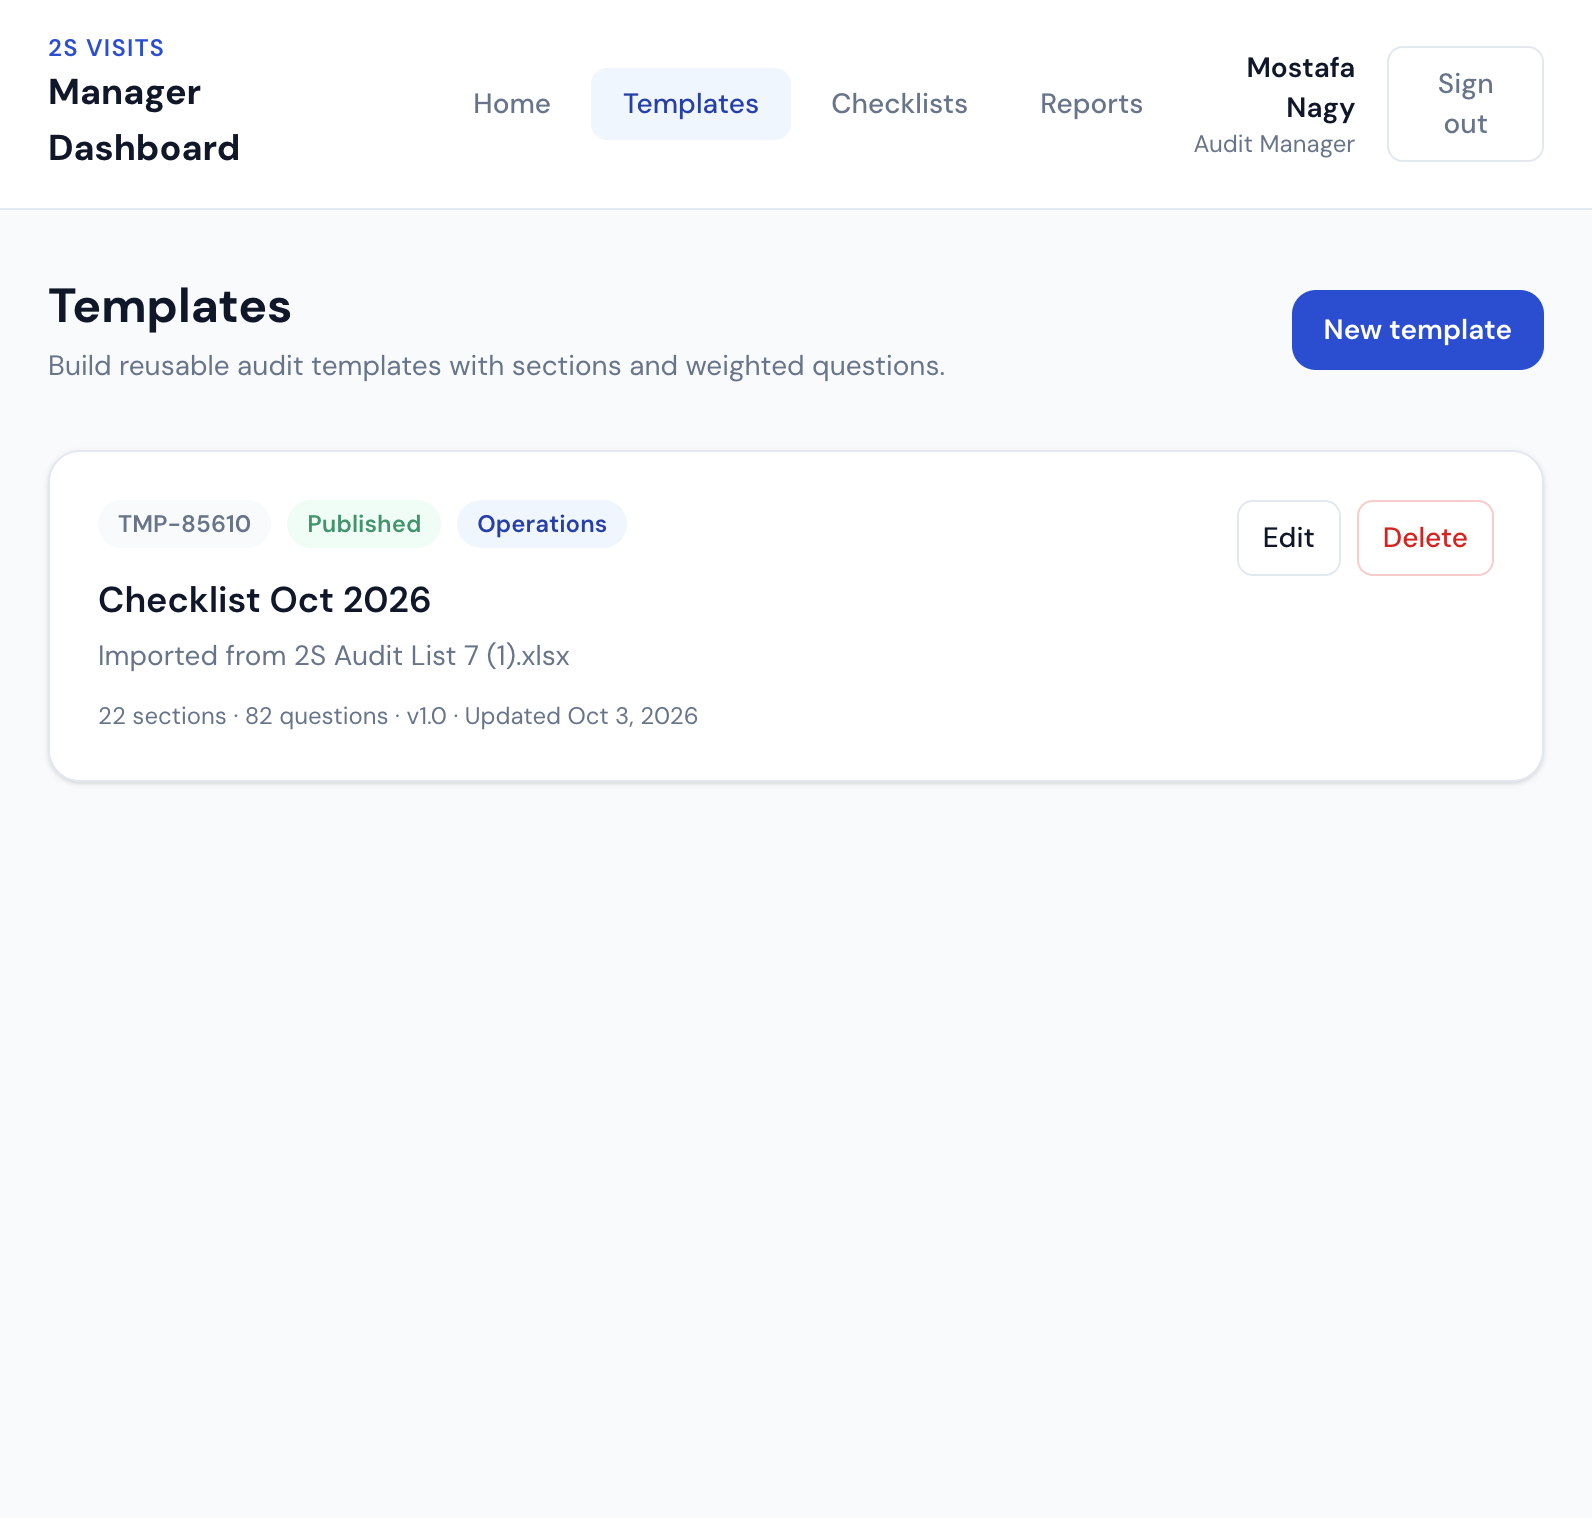
Fill in the identity of the audit:
- Template name — clear name (for example “Store Ops Q4”)
- Description — short note on scope or source
- Audit category — Safety, Operations, or Compliance
- Maximum question weight — usually 0–3 (0 = no risk … 3 = high)
Then click Next: Add Sections.
3.3 Step 2 — Sections & questions
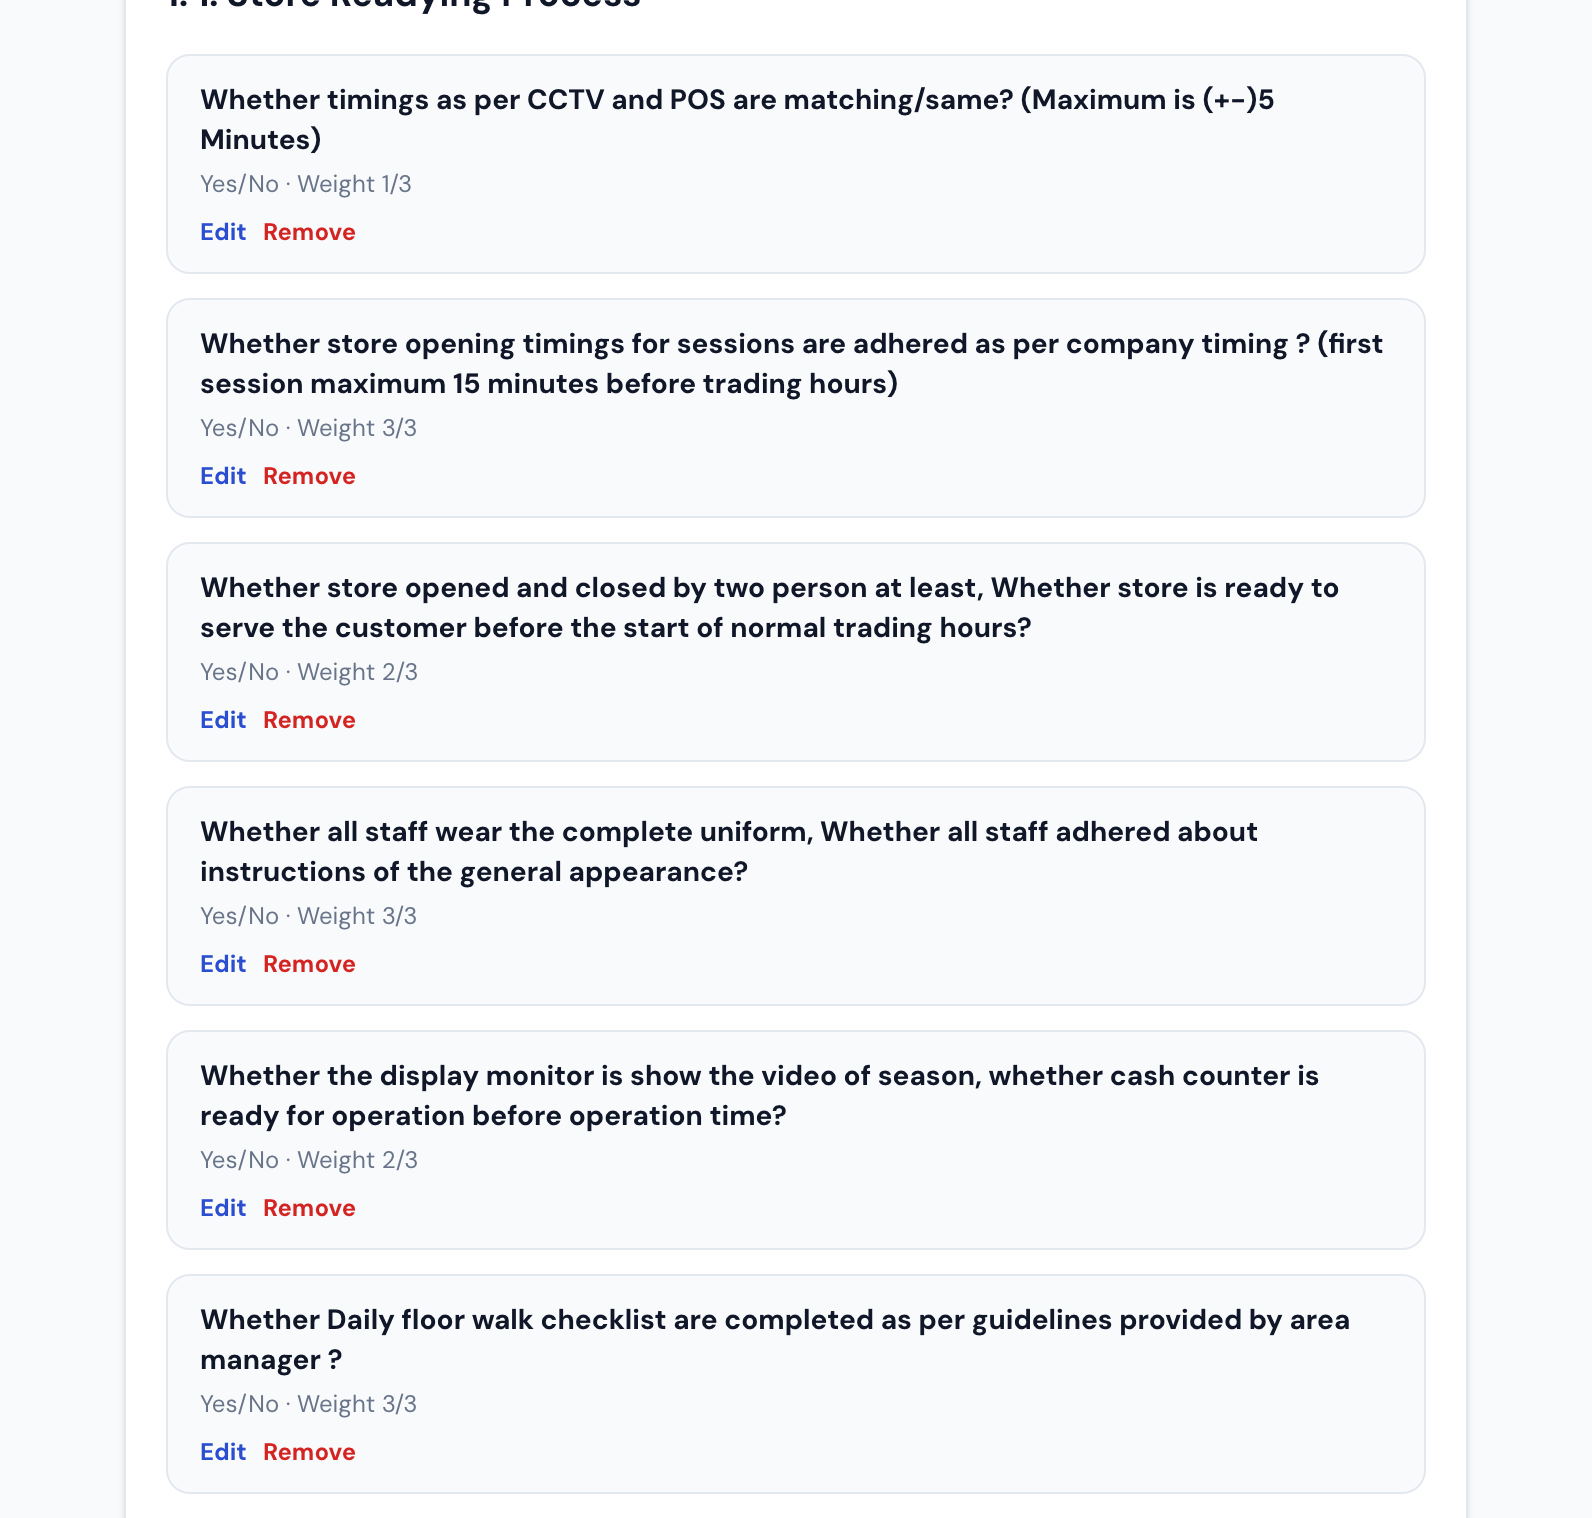
Group related checks into sections (for example “Store Readying Process”). For each question:
- Write the question text clearly.
- Choose the answer type (often Yes / No).
- Set the weight (how much it counts toward the score).
- Use Edit / Remove to adjust items.
3.4 Step 3 — Preview & publish
- Preview the full form.
- Save as draft while you still edit.
- When ready, publish the template.
4. Create & assign a checklist (dashboard)
A checklist is work assigned to people: “use this published template, by this deadline.” Area / Regional / Audit Managers who receive it then run visits on the phone.
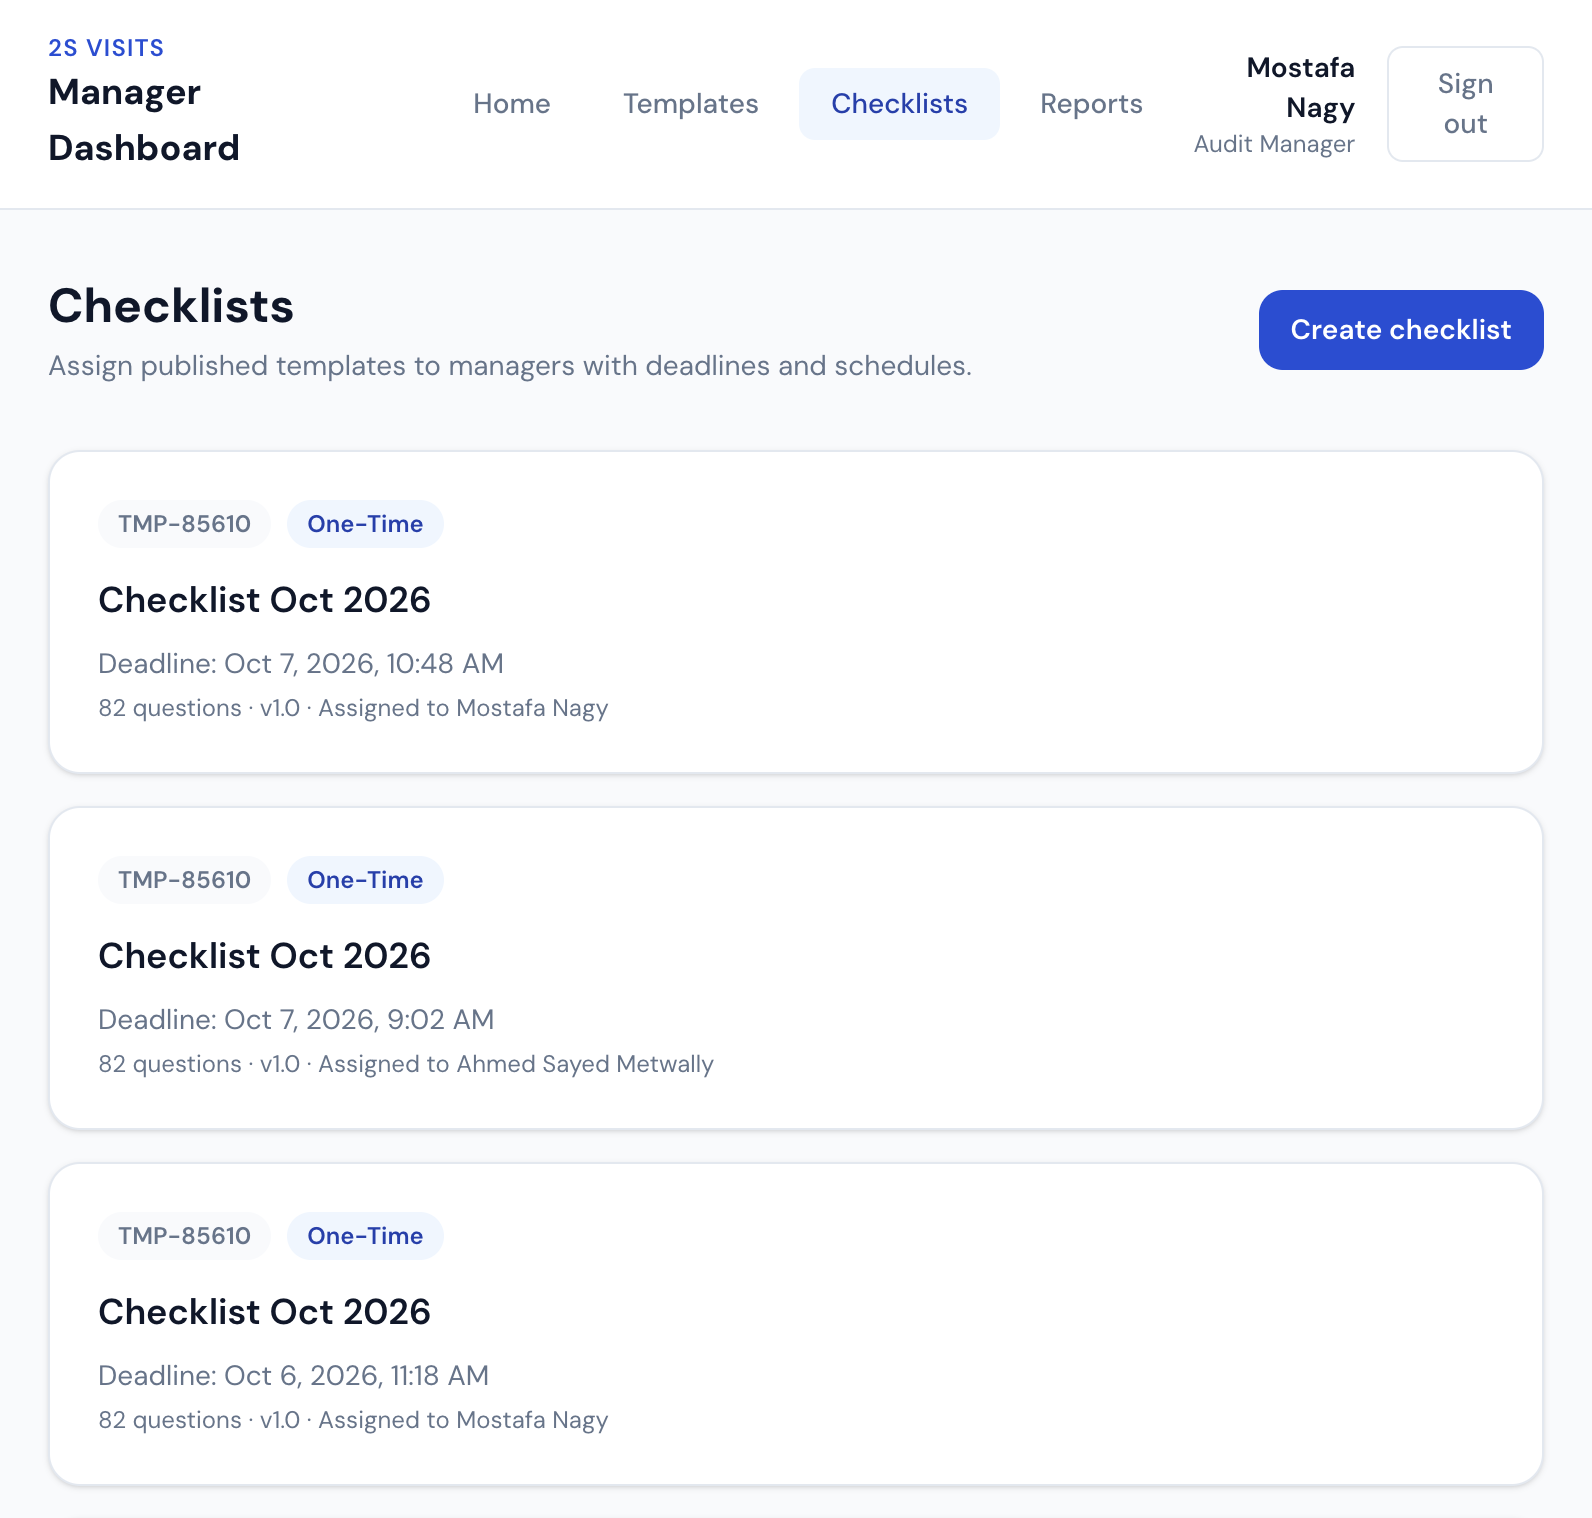
4.1 Open Checklists
- Click Checklists in the top menu.
- You see existing assignments (template name, deadline, who it was given to).
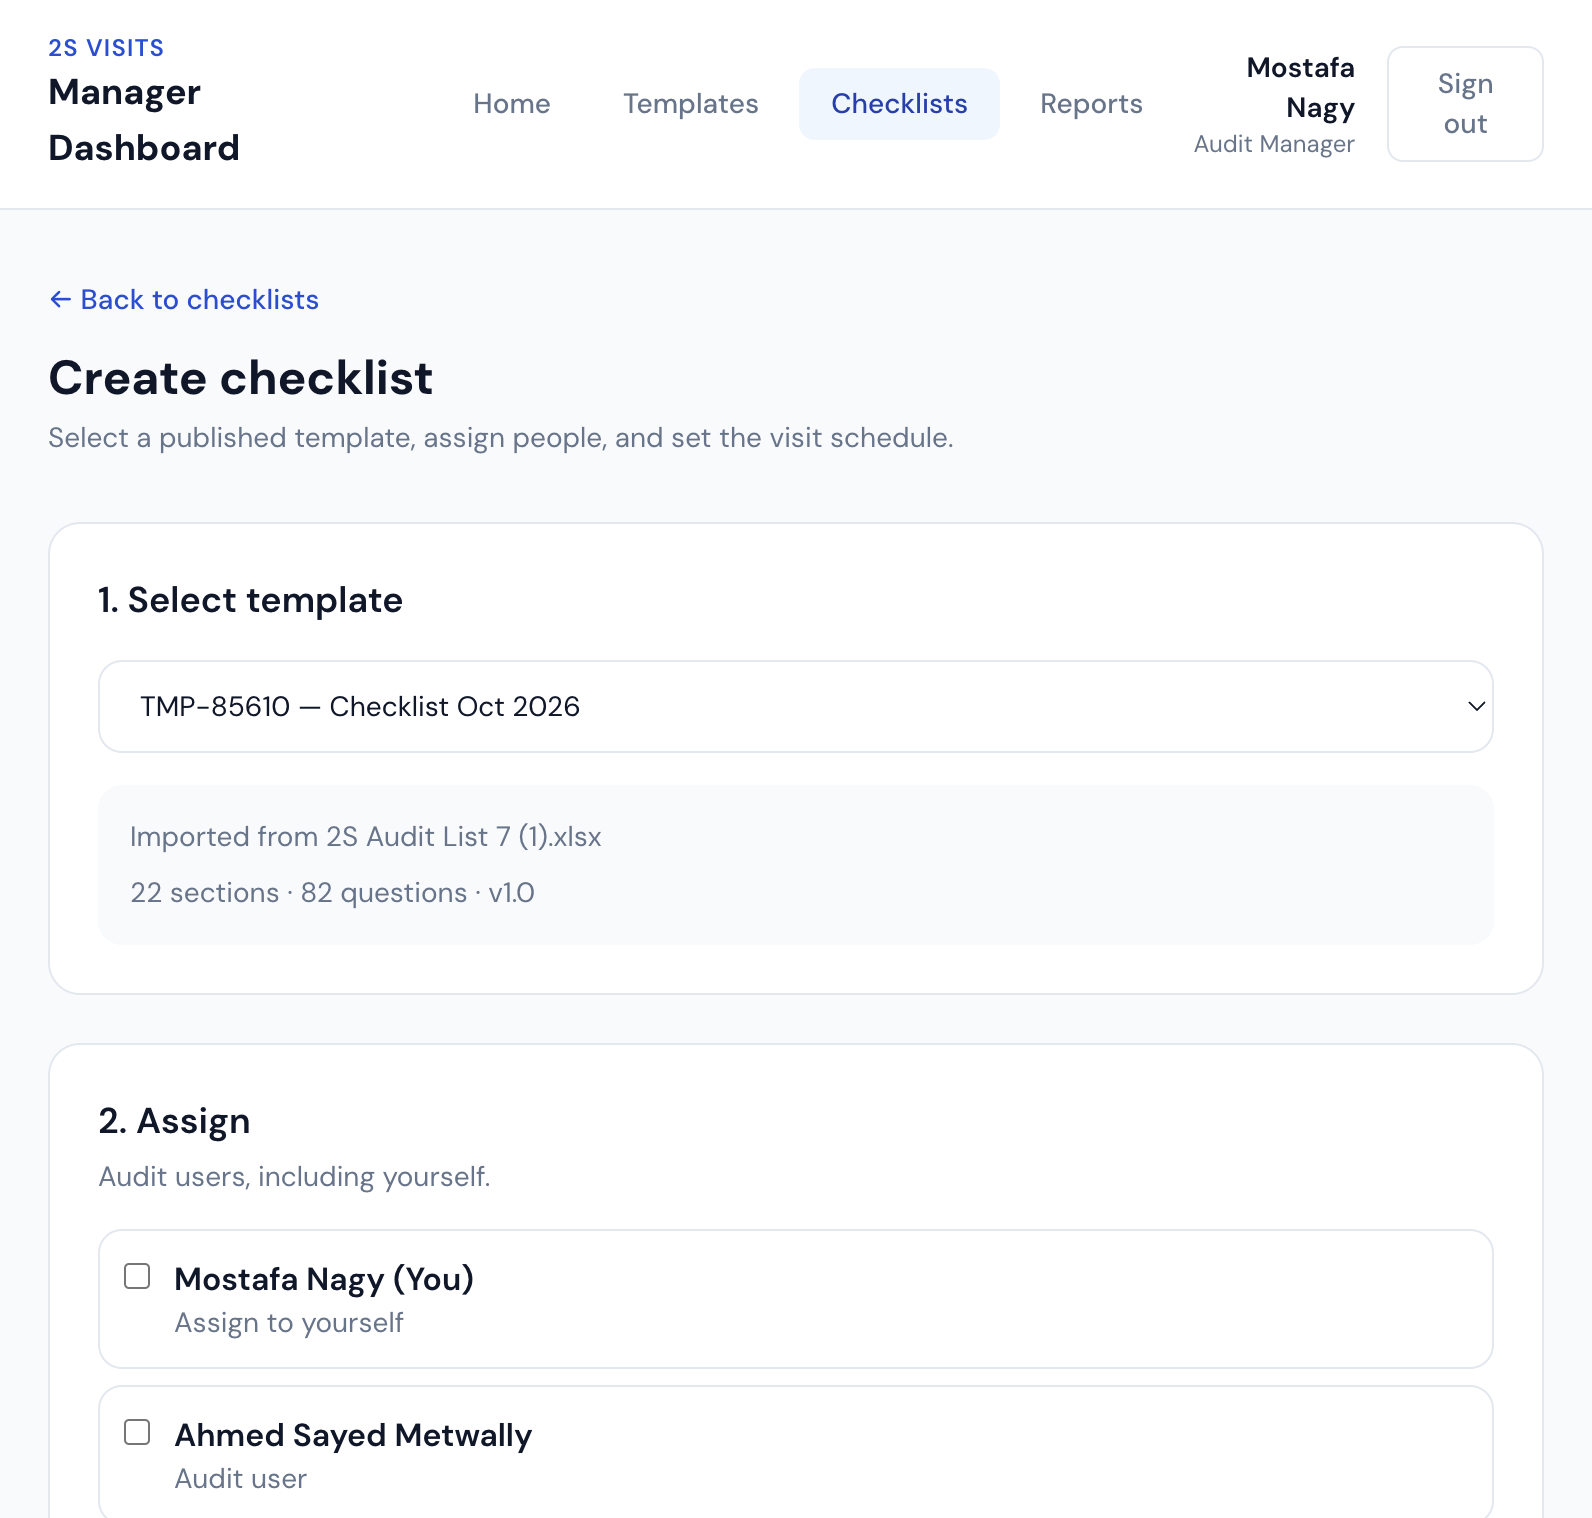
4.2 Create checklist
- Click Create checklist.
- Choose a published template.
- Select the people who should do the visits (Area / Regional / Audit managers on your team).
- Set the deadline (and schedule if offered).
- Save.
5. Review reports
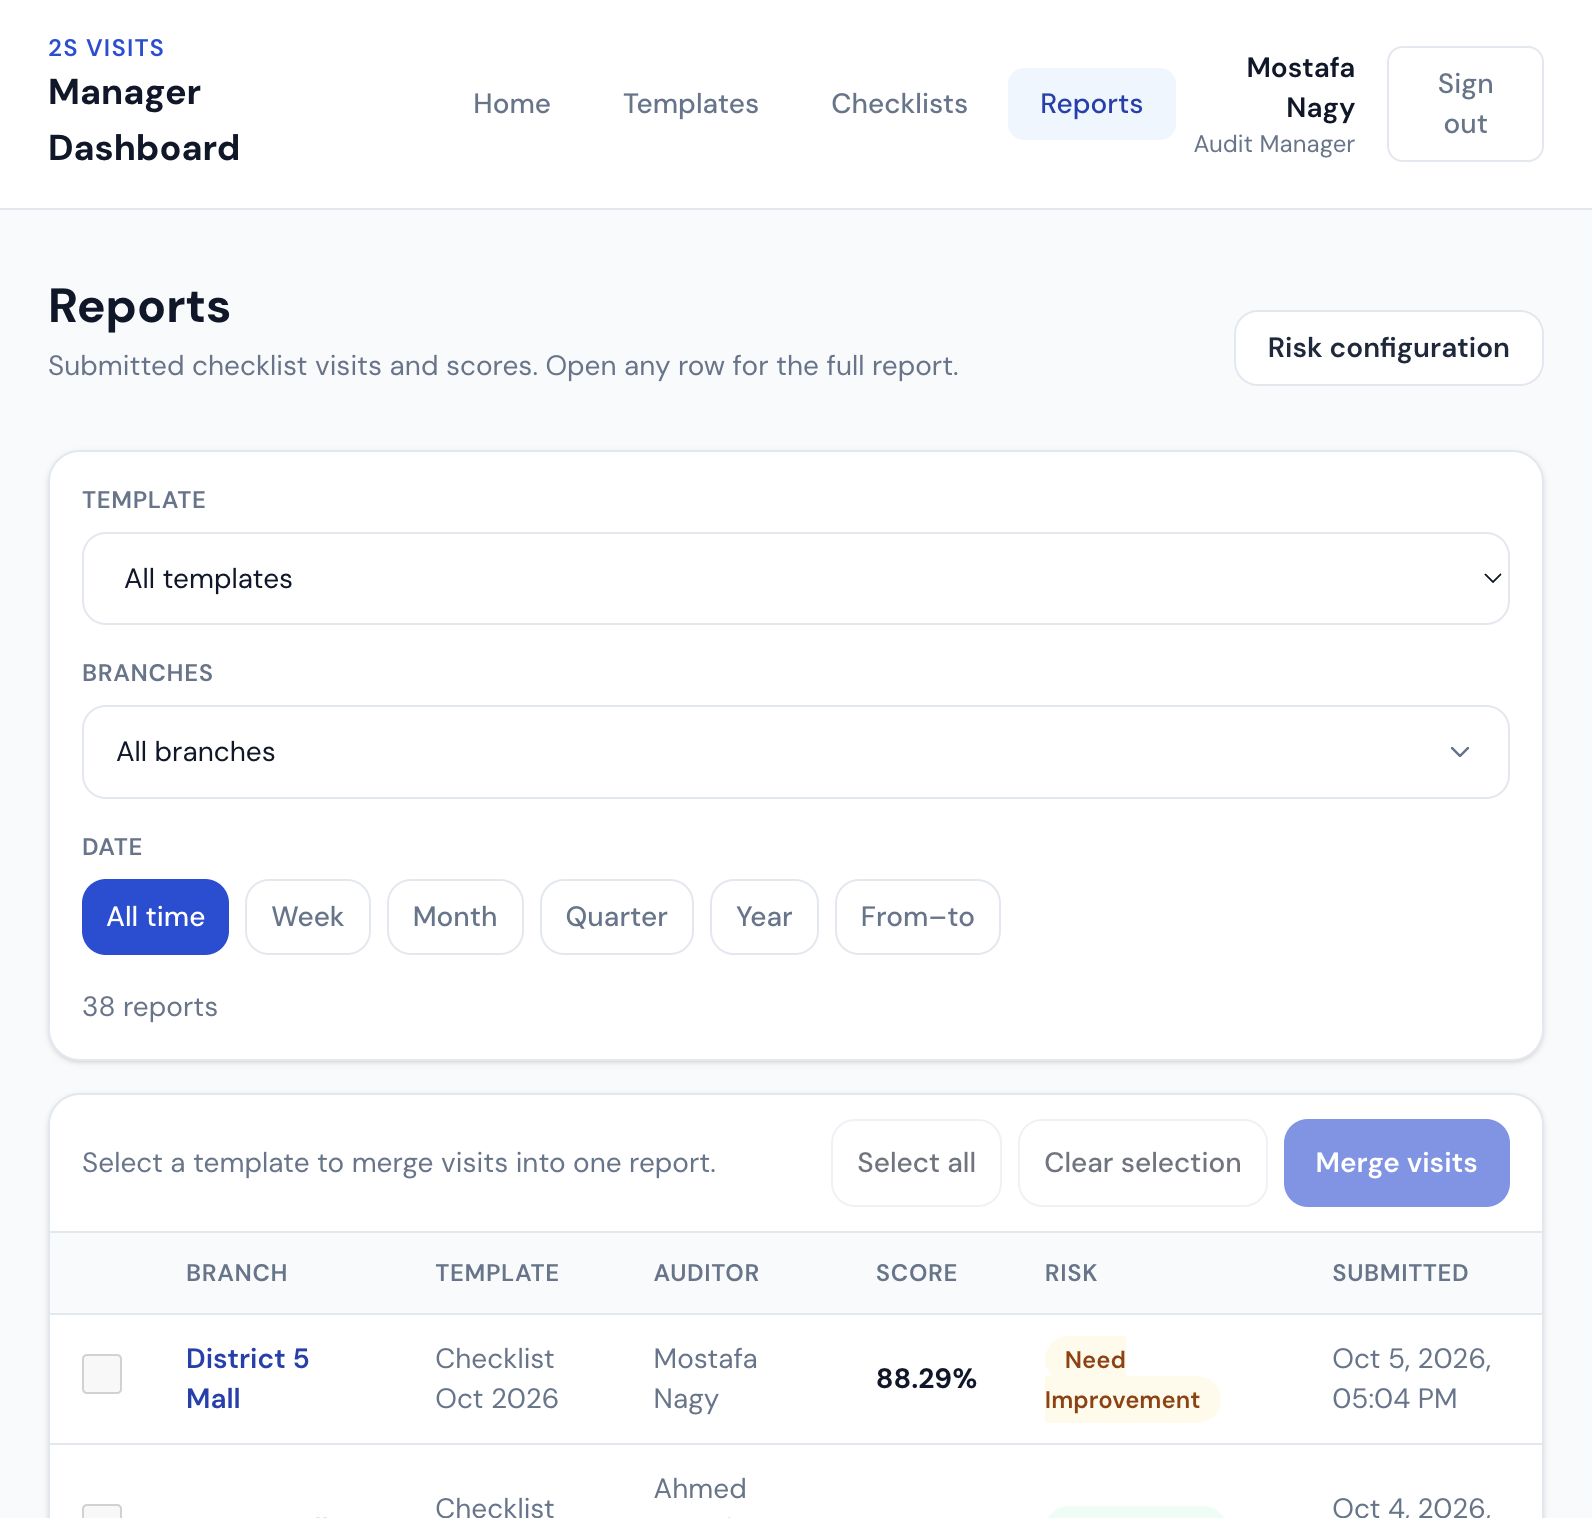
After visits are submitted, open Reports on the dashboard (or Completed on the phone).
- Filter by template, branch, or date.
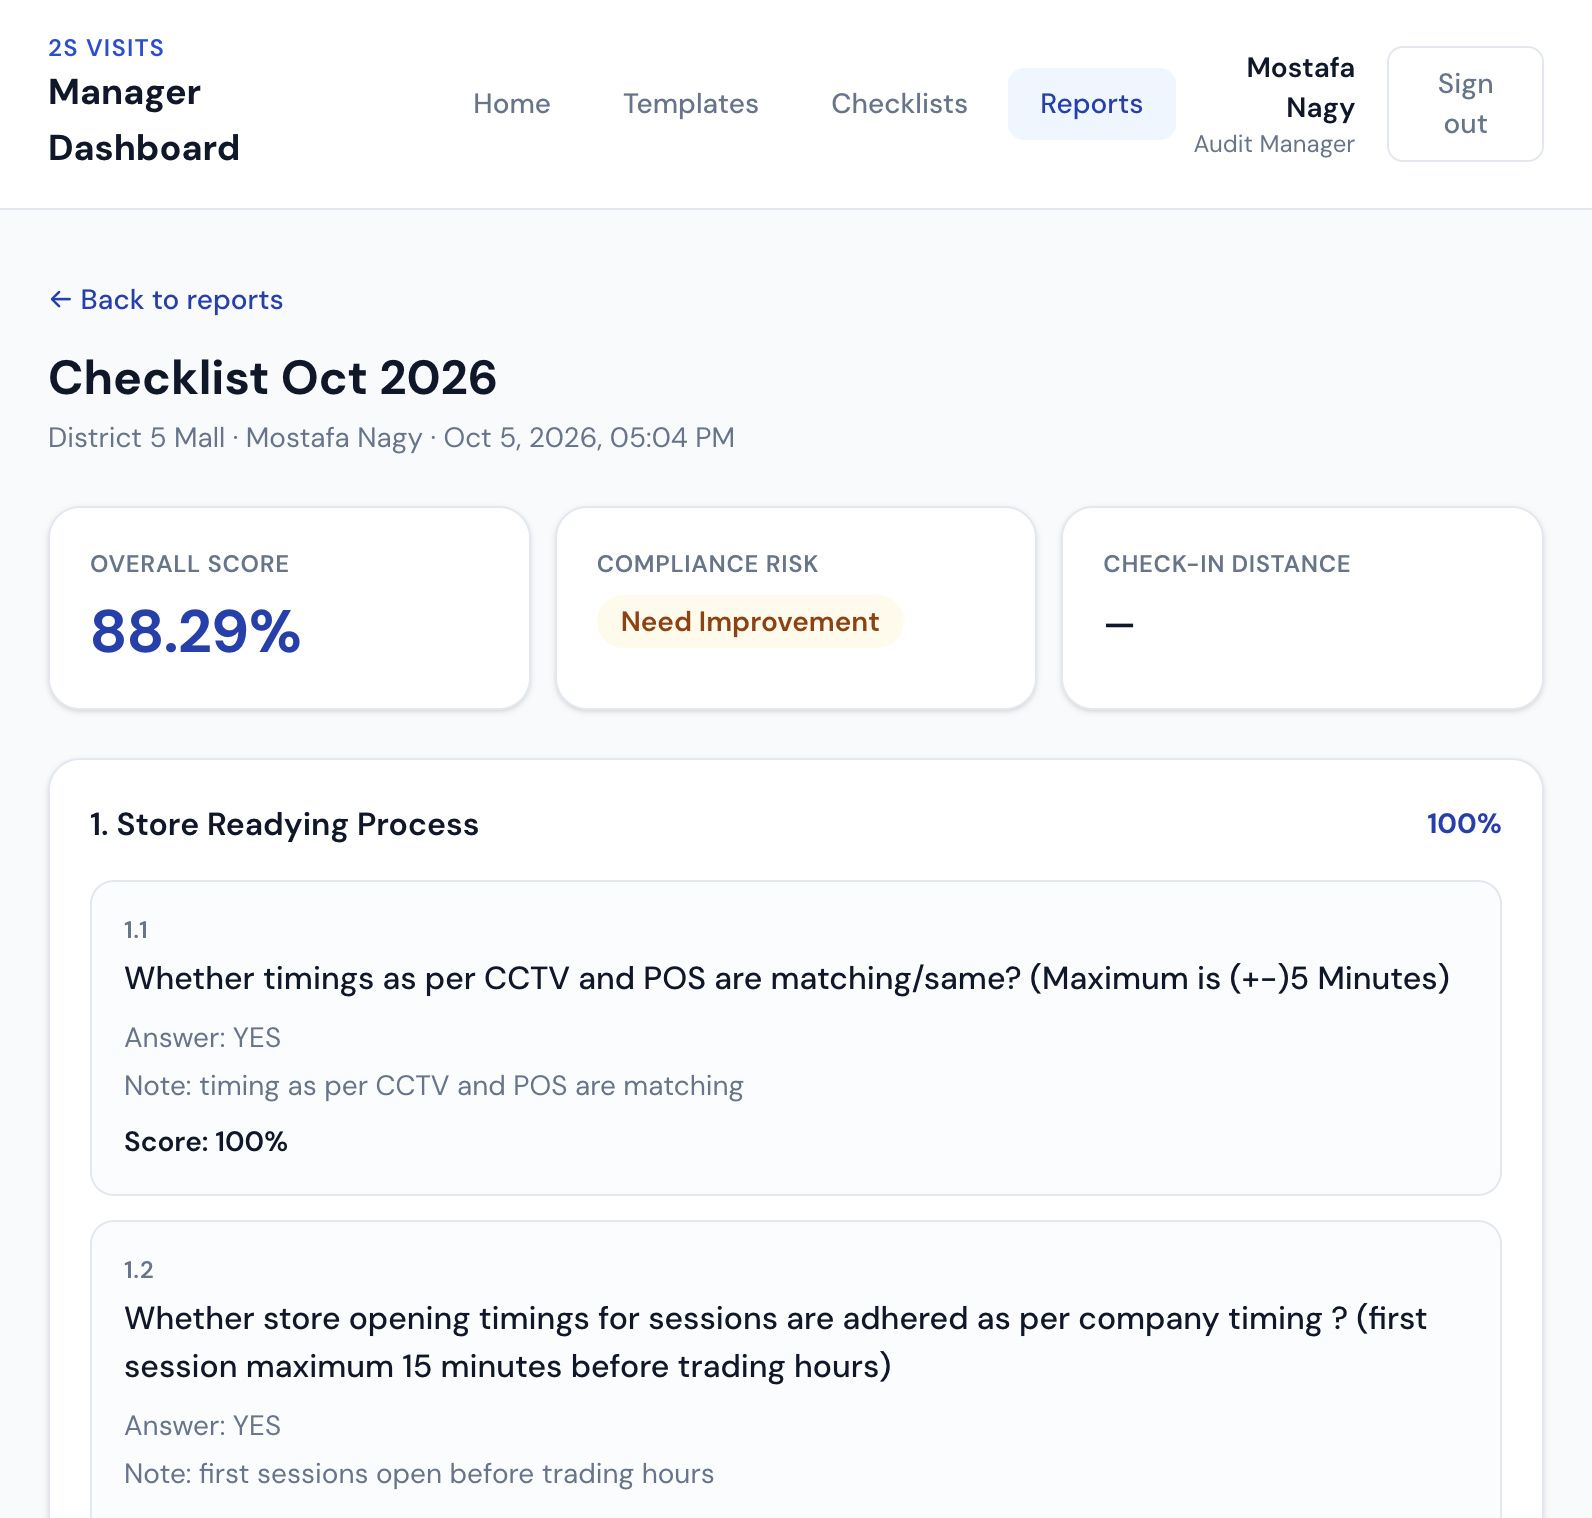
- Click a branch / visit to open the full report (answers, notes, score).
- Select several visits (same template) and use Merge visits for a combined view.
6. How answers are scored
| Choice | Meaning for the score |
|---|---|
| YES | Full points |
| NI (Needs Improvement) | Half points |
| NO | Zero points |
| NA | Not graded (skipped for the score) |
The overall percent and risk label (Satisfactory / Need Improvement / Unsatisfactory) are calculated automatically when the visit is submitted.
7. Common problems
| Problem | What to try |
|---|---|
| Cannot sign in | Check email and password. Ask an administrator to confirm the account is active. |
| Cannot start a visit from a template | The template must be Published. Draft templates cannot be used for visits. |
| Location check fails | Turn on GPS / location permission and stand near the branch. Some roles skip this step. |
| Left mid-visit — where is my work? | Open My Visits and tap the visit marked In Progress. |
| New phone — unfinished answers missing | The visit still appears, but draft answers stay on the old phone. Continue from check-in if needed. |
| No people listed when creating a checklist | Those users must already exist in the organization. Ask an administrator to add them. |
| No delete button on a visit | Only administrators can delete visits. |
Quick checklists
Do a visit (phone)
- Sign in
- Templates → pick form → pick branch
- Check-in (dates + location if asked)
- Answer questions → Finish → Review → Submit
- If interrupted: My Visits → In Progress → resume
Create template (dashboard)
- Templates → New template
- Details (name, category, weight) → Next
- Add sections & questions with weights
- Preview → Publish when ready
Assign checklist (dashboard)
- Checklists → Create checklist
- Pick published template → pick people → set deadline → Save